User Log In
User log in and log out
Introduction
In the user registration guide we learned how to integrate a signup option into an iOS app using the Back4App platform and the ParseSwift SDK. Once a user successfully signs up in your app, logging in and logging out actions are key features within the app’s flow.
The ParseSwift SDK will allow us to integrate these features seamlessly into any iOS app.
Prerequisites
To complete this quickstart, you need:
- Xcode.
- An app created at Back4App.
- Note: Follow the Install Parse SDK (Swift) Tutorial to create an Xcode Project connected to Back4App.
Goal
To implement a user login and logout feature using the ParseSwift SDK and the Back4App platform.
1 - Setting up the login and logout features
Before starting to implement any login functionality, we have to create the object that will represent the user. For simplicity, we will reuse the same User struct (which conforms to the ParseUser protocol) we introduced in the user registration guide:
import Foundation
import ParseSwift

struct User: ParseUser {
  ...

  var username: String?
  var email: String?
  var emailVerified: Bool?
  var password: String?

  var age: Int?
}
We recommend following the user registration guide and registering at least one user to use it as an example for this guide.
Similar to the signup process, logging in requires a form where the user enters their username and password. Then, we perform a login request using the corresponding methods provided by the ParseSwift SDK. In its turn, Back4App processes the request and returns a response containing the login information. When an error occurs, the response returns information to identify and handle this error.
The logout process is straightforward. The ParseSwift SDK allows us to implement it in a single line of code.
2 - Setting up the app
Once you connected your Xcode project to your Back4App application, the next step is to set up the app’s user interface.
For the login process, we will implement a simple controller containing the corresponding input fields and a login button:
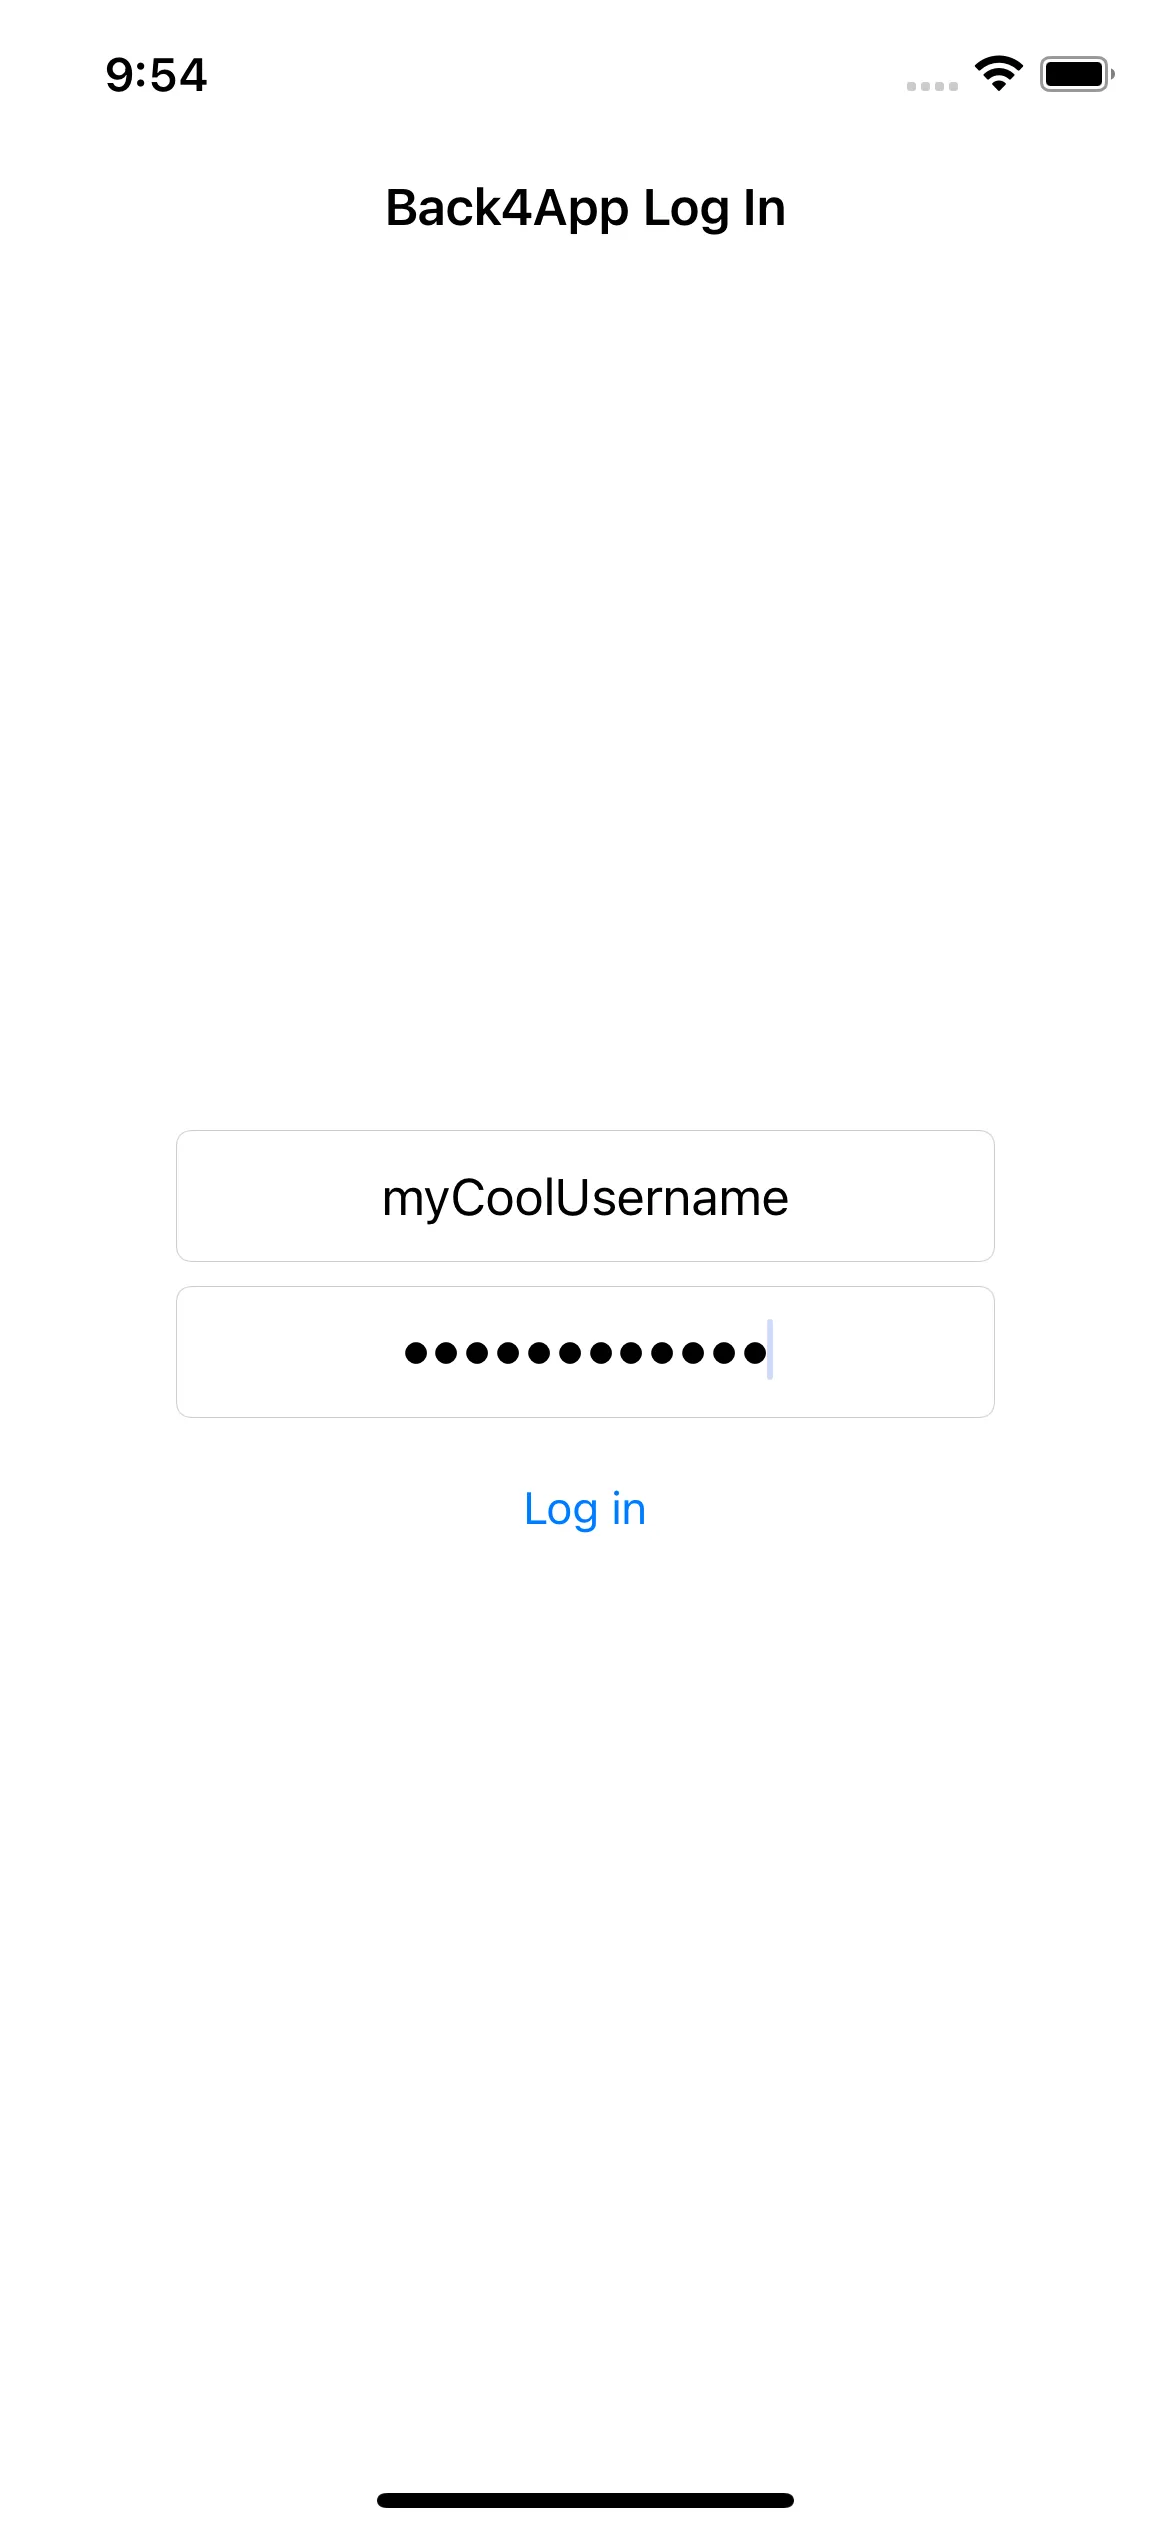
The class in charge of this form is called LogInController and it is a subclass of UIViewController. The key components to integrate into this controller are two UITextField’s and one UIButton. The following snippet shows the implementation of the LogInController class:
1   import UIKit
2   import ParseSwift
3
4   class LogInController: UIViewController {
5     private let usernameTextField: UITextField = {
6       let textField = UITextField()
7       textField.borderStyle = .roundedRect
8       textField.placeholder = "Username *"
9       textField.autocapitalizationType = .none
10      textField.textAlignment = .center
11      return textField
12    }()
13
14    private let passwordTextField: UITextField = {
15      let textField = UITextField()
16      textField.borderStyle = .roundedRect
17      textField.isSecureTextEntry = true
18      textField.placeholder = "Password *"
19      textField.textAlignment = .center
20      return textField
21    }()
22
23    private let logInButton: UIButton = {
24      let button = UIButton(type: .roundedRect)
25      button.setTitle("Log in", for: .normal)
26      return button
27    }()
28
29    override func viewDidLoad() {
30    super.viewDidLoad()
31
32      navigationItem.title = "Back4App Log In"
33
34      // Lays out the login form
35      let stackView = UIStackView(arrangedSubviews: [usernameTextField, passwordTextField, logInButton])
36      stackView.translatesAutoresizingMaskIntoConstraints = false
37      stackView.spacing = 8
38      stackView.axis = .vertical
39      stackView.distribution = .fillEqually
40
41      let stackViewHeight = CGFloat(stackView.arrangedSubviews.count) * (44 + stackView.spacing) - stackView.spacing
42
43      view.addSubview(stackView)
44      stackView.centerXAnchor.constraint(equalTo: view.safeAreaLayoutGuide.centerXAnchor).isActive = true
45      stackView.centerYAnchor.constraint(equalTo: view.safeAreaLayoutGuide.centerYAnchor).isActive = true
46      stackView.widthAnchor.constraint(equalTo: view.safeAreaLayoutGuide.widthAnchor, multiplier: 0.7).isActive = true
47      stackView.heightAnchor.constraint(equalToConstant: stackViewHeight).isActive = true
48
49      // Adds the method that will be called when the user taps the login button
50      logInButton.addTarget(self, action: #selector(handleLogIn), for: .touchUpInside)
51
52      // If the user is already logged in, we redirect them to the HomeController
53      guard let user = User.current else { return }
54      let homeController = HomeController()
55      homeController.user = user
56
57      navigationController?.pushViewController(homeController, animated: true)
58    }
59
60    /// Called when the user taps on the logInButton button
61    @objc private func handleLogIn() {
62      guard let username = usernameTextField.text, !username.isEmpty,
63            let password = passwordTextField.text, !password.isEmpty else {
64        // Shows an alert with the appropriate title and message.
65        return showMessage(title: "Error", message: "Invalid credentials.")
66      }
67
68      logIn(with: username, password: password)
69    }
70
71    /// Logs in the user and presents the app's home screen (HomeController)
72    /// - Parameters:
73    ///   - username: User's username
74    ///   - password: User's password
75    private func logIn(with username: String, password: String) {
76      // TODO: Here we will implement the login process
77    }
78  }
Additionally, the helper function showMessage(title:message:) is implemented in an extension of UIViewController:
1   extension UIViewController {
2
3       /// Presents an alert with a title, a message and a back button.
4       /// - Parameters:
5       ///   - title: Title for the alert
6       ///   - message: Shor message for the alert
7       func showMessage(title: String, message: String) {
8           let alertController = UIAlertController(title: title, message: message, preferredStyle: .alert)
9
10          alertController.addAction(UIAlertAction(title: "Back", style: .cancel))
11
12          present(alertController, animated: true)
13      }
14  }
For the logout process, we insert a button in the home controller, i.e., HomeController. This view controller will only contain the logout button and a label showing the user’s username:
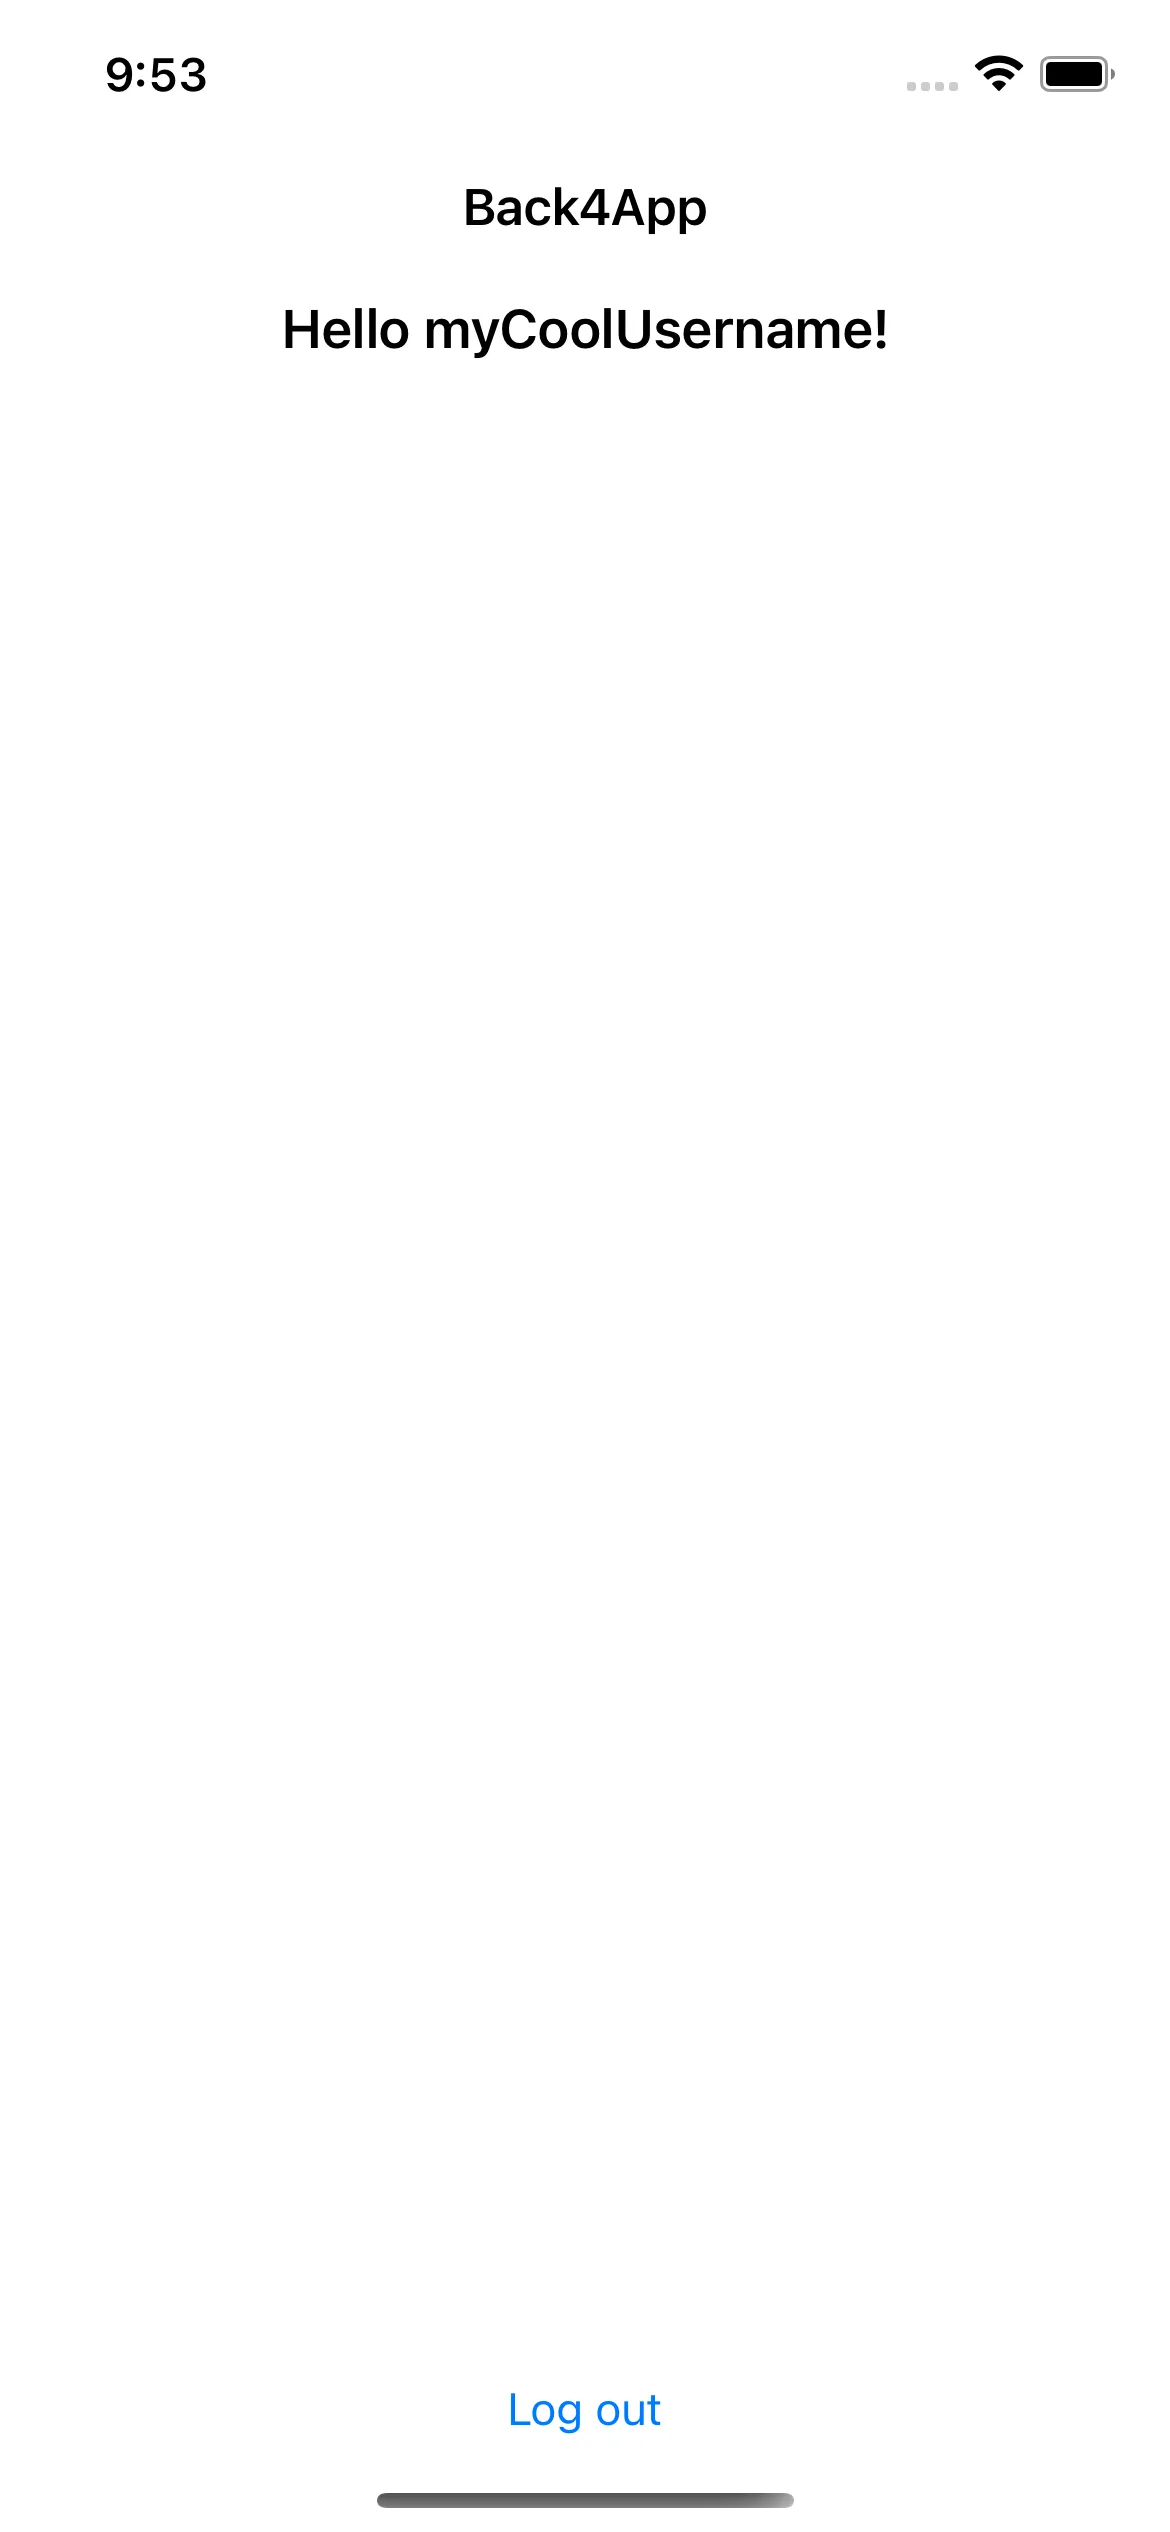
The implementation of this view controller is straightforward:
1   import UIKit
2   import ParseSwift
3
4   class HomeController: UIViewController {
5
6     /// When set, it updates the usernameLabel's text with the user's username.
7     var user: User? {
8       didSet {
9         usernameLabel.text = "Hello \(user?.username ?? "N/A")!"
10      }
11    }
12
13    private let usernameLabel: UILabel = {
14      let label = UILabel()
15      label.textAlignment = .center
16      label.font = .boldSystemFont(ofSize: 18)
17      label.translatesAutoresizingMaskIntoConstraints = false
18      return label
19    }()
20
21    private let logOutButton: UIButton = {
22      let button = UIButton(type: .roundedRect)
23      button.setTitle("Log out", for: .normal)
24      button.translatesAutoresizingMaskIntoConstraints = false
25      return button
26    }()
27
28    override func viewDidLoad() {
29      super.viewDidLoad()
30
31      // Sets up the layout (usernameLabel and logOutButton)
32      view.backgroundColor = .systemBackground
33      navigationItem.hidesBackButton = true
34      navigationItem.title = "Back4App"
35      view.addSubview(usernameLabel)
36      view.addSubview(logOutButton)
37
38      usernameLabel.topAnchor.constraint(equalTo: view.safeAreaLayoutGuide.topAnchor, constant: 8).isActive = true
39      usernameLabel.centerXAnchor.constraint(equalTo: view.safeAreaLayoutGuide.centerXAnchor).isActive = true
40
41      logOutButton.bottomAnchor.constraint(equalTo: view.safeAreaLayoutGuide.bottomAnchor, constant: 8).isActive = true
42      logOutButton.centerXAnchor.constraint(equalTo: view.safeAreaLayoutGuide.centerXAnchor).isActive = true
43
44      // Adds the method that will be called when the user taps the logout button
45      logOutButton.addTarget(self, action: #selector(handleLogOut), for: .touchUpInside)
46    }
47
48    /// Called when the user taps the logout button.
49    @objc private func handleLogOut() {
50      // TODO: Here we will implement the logout process
51    }
52  }
3 - Login request
We now proceed to implement the logIn(with:password) method in the LogInController class. The ParseUser protocol gives the User object the static method login(username:password). This method prepares and sends the login request to your Back4App application. Depending on the use case, one can use one of the many implementations of the login(...) method. We now complete the logIn(with:password) method in LogInController:
1   class HomeController: UIViewController {
2    ...
3
4     /// Logs in the user and presents the app's home screen (HomeController)
5     /// - Parameters:
6     ///   - username: User's username
7     ///   - password: User's password
8     private func logIn(with username: String, password: String) {
9       // WARNING: Use only one of the following implementations, the synchronous or asynchronous option
10
11      // Logs in the user synchronously, it throws a ParseError error if something happened.
12      // This should be executed in a background thread!
13      do {
14        let loggedInUser = try User.login(username: username, password: password)
15
16        // After the login success we send the user to the home screen
17        let homeController = HomeController()
18        homeController.user = loggedInUser
19
20        navigationController?.pushViewController(homeController, animated: true)
21      } catch let error as ParseError {
22        showMessage(title: "Error", message: "Failed to log in: \(error.message)")
23      } catch {
24        showMessage(title: "Error", message: "Failed to log in: \(error.localizedDescription)")
25      }
26
27      // Logs in the user asynchronously
28      User.login(username: username, password: password) { [weak self] result in // Handle the result (of type Result<User, ParseError>)
29        switch result {
30        case .success(let loggedInUser):
31          self?.usernameTextField.text = nil
32          self?.passwordTextField.text = nil
33
34          // After the login success we send the user to the home screen
35          let homeController = HomeController()
36          homeController.user = loggedInUser
37
38          self?.navigationController?.pushViewController(homeController, animated: true)
39        case .failure(let error):
40          self?.showMessage(title: "Error", message: "Failed to log in: \(error.message)")
41        }
42      }
43    }
44  }
4 - Logout request
The logout request is as simple as the login request. Once again, the ParseUser protocol provides the User with the static method logout(...). By calling this method the current user (accessed via User.current) logs out from your Back4App application. We will call this method when the user taps the logout button located on the home screen, i.e., in the handleLogOut() method in the HomeController class, we add the following:
1   class HomeController: UIViewController {
2     ...
3
4     /// Called when the user taps the logout button.
5     @objc private func handleLogOut() {
6       // WARNING: Use only one of the following implementations, the synchronous or asynchronous option
7
8       // Logs out the user synchronously, it throws a ParseError error if something happened.
9       // This should be executed in a background thread!
10      do {
11        try User.logout()
12
13        // After the logout succeeded we dismiss the home screen
14        navigationController?.popViewController(animated: true)
15      } catch let error as ParseError {
16        showMessage(title: "Error", message: "Failed to log out: \(error.message)")
17      } catch {
18        showMessage(title: "Error", message: "Failed to log out: \(error.localizedDescription)")
19      }
20
21      // Logs out the user asynchronously
22      User.logout { [weak self] result in // Handle the result (of type Result<Void, ParseError>)
23        switch result {
24        case .success:
25          // After the logout succeeded we dismiss the home screen
26          self?.navigationController?.popViewController(animated: true)
27        case .failure(let error):
28          self?.showMessage(title: "Error", message: "Failed to log out: \(error.message)")
29        }
30      }
31    }
32  }
5 - Run the app!
In this repository, you will find an Xcode project containing the login and logout processes we described above. Before running the app, make sure you connected the Xcode project to your Back4App application.
Conclusion
The Back4App and the ParseSwift SDK allow us to integrate login and logout features in iOS apps in a quick way. After connecting your Back4App application with your Xcode project, the login (or logout) process only requires calling a single method.