Quickstart
Install Parse SDK on your iOS Swift Project
Introduction
In this section you will learn how to install Parse Swift iOS SDK into your Xcode project.
In this tutorial we will use a basic app created in Swift with Xcode 12 and iOS 14.
At any time, you can access the complete Project built with this tutorial at our GitHub repository.
Prerequisites
To complete this tutorial, you need:
- An app created at Back4App.
- Xcode.
- Basic iOS app.
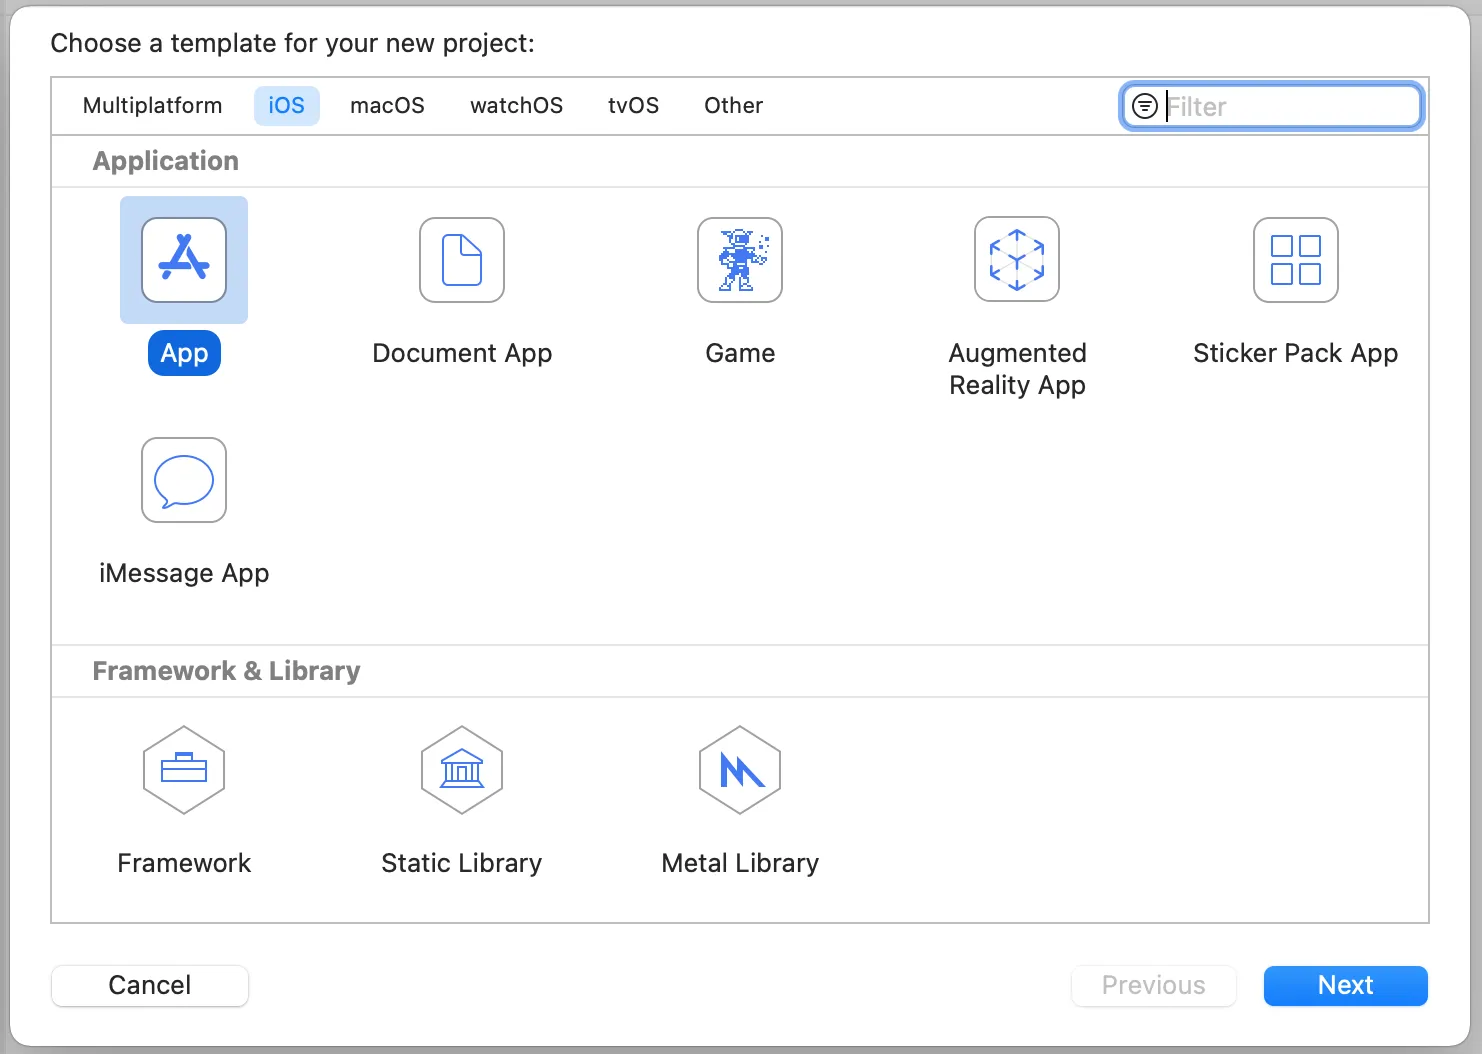
- Note:If you don’t have a basic app created you can open Xcode and hit File-> New-> Project -> iOS. Then select App. After you create your basic app you are ready to follow this guide.

1 - Choose your Installation Method
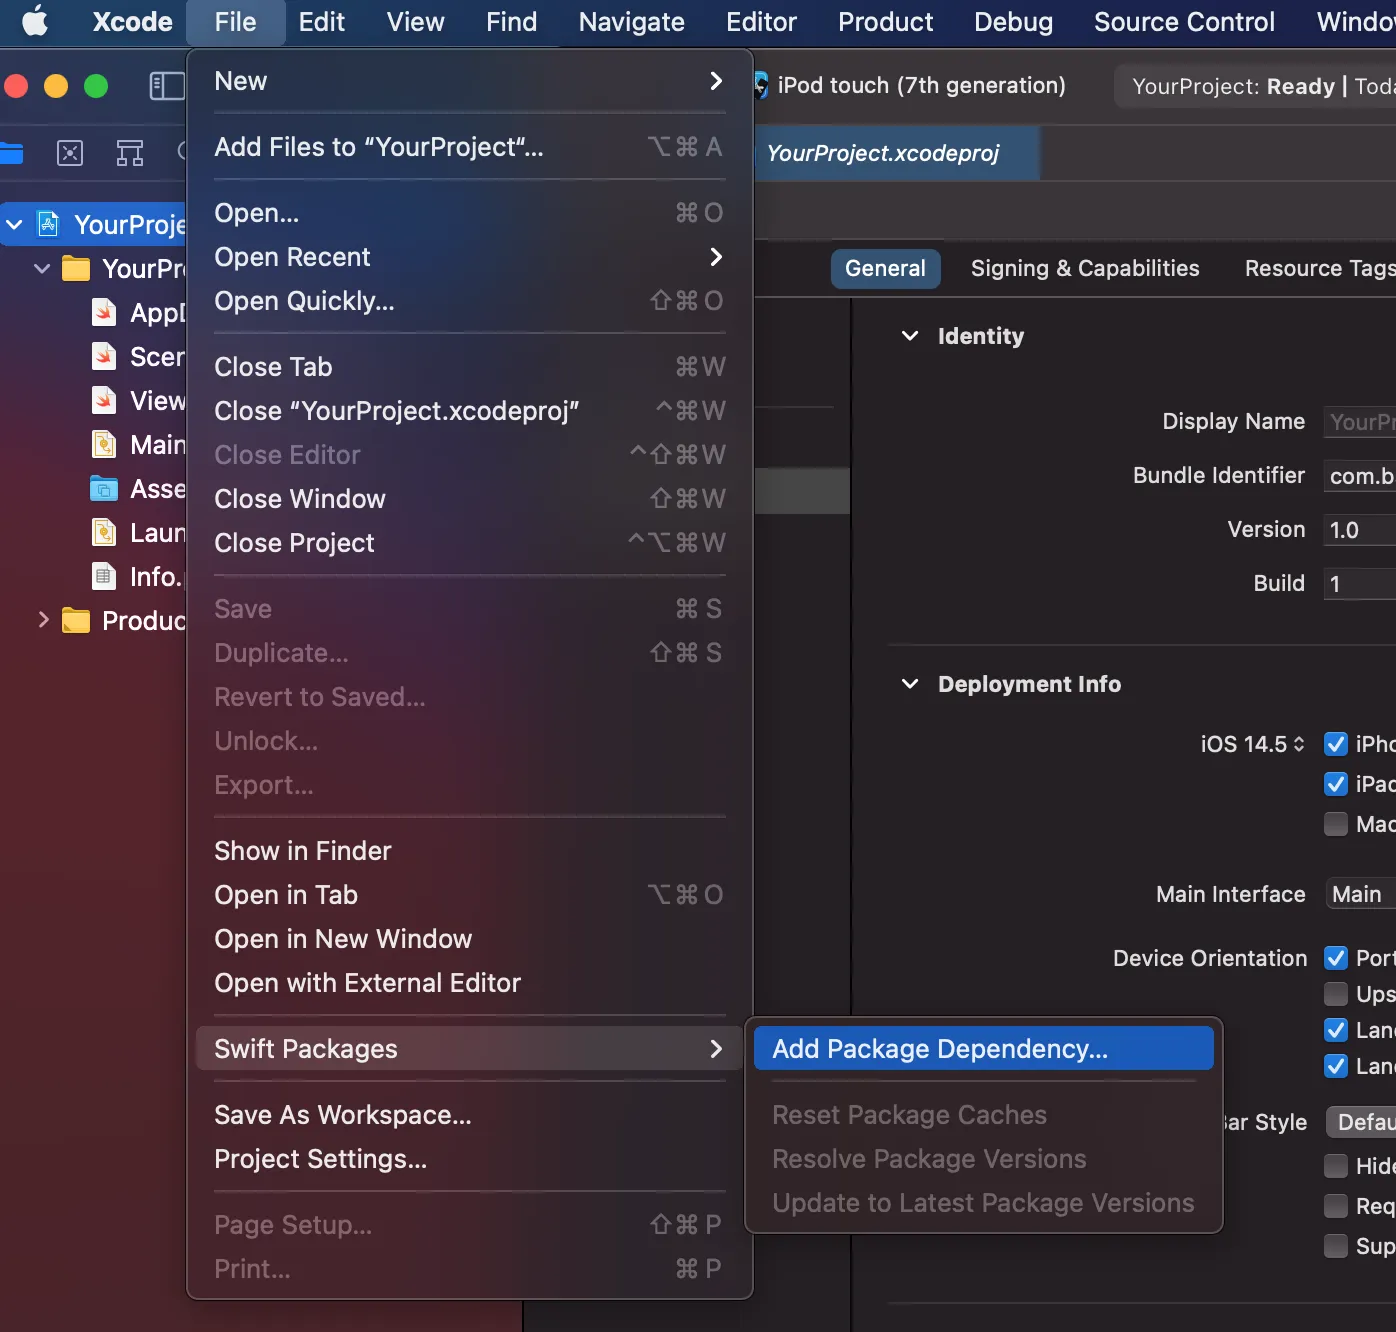
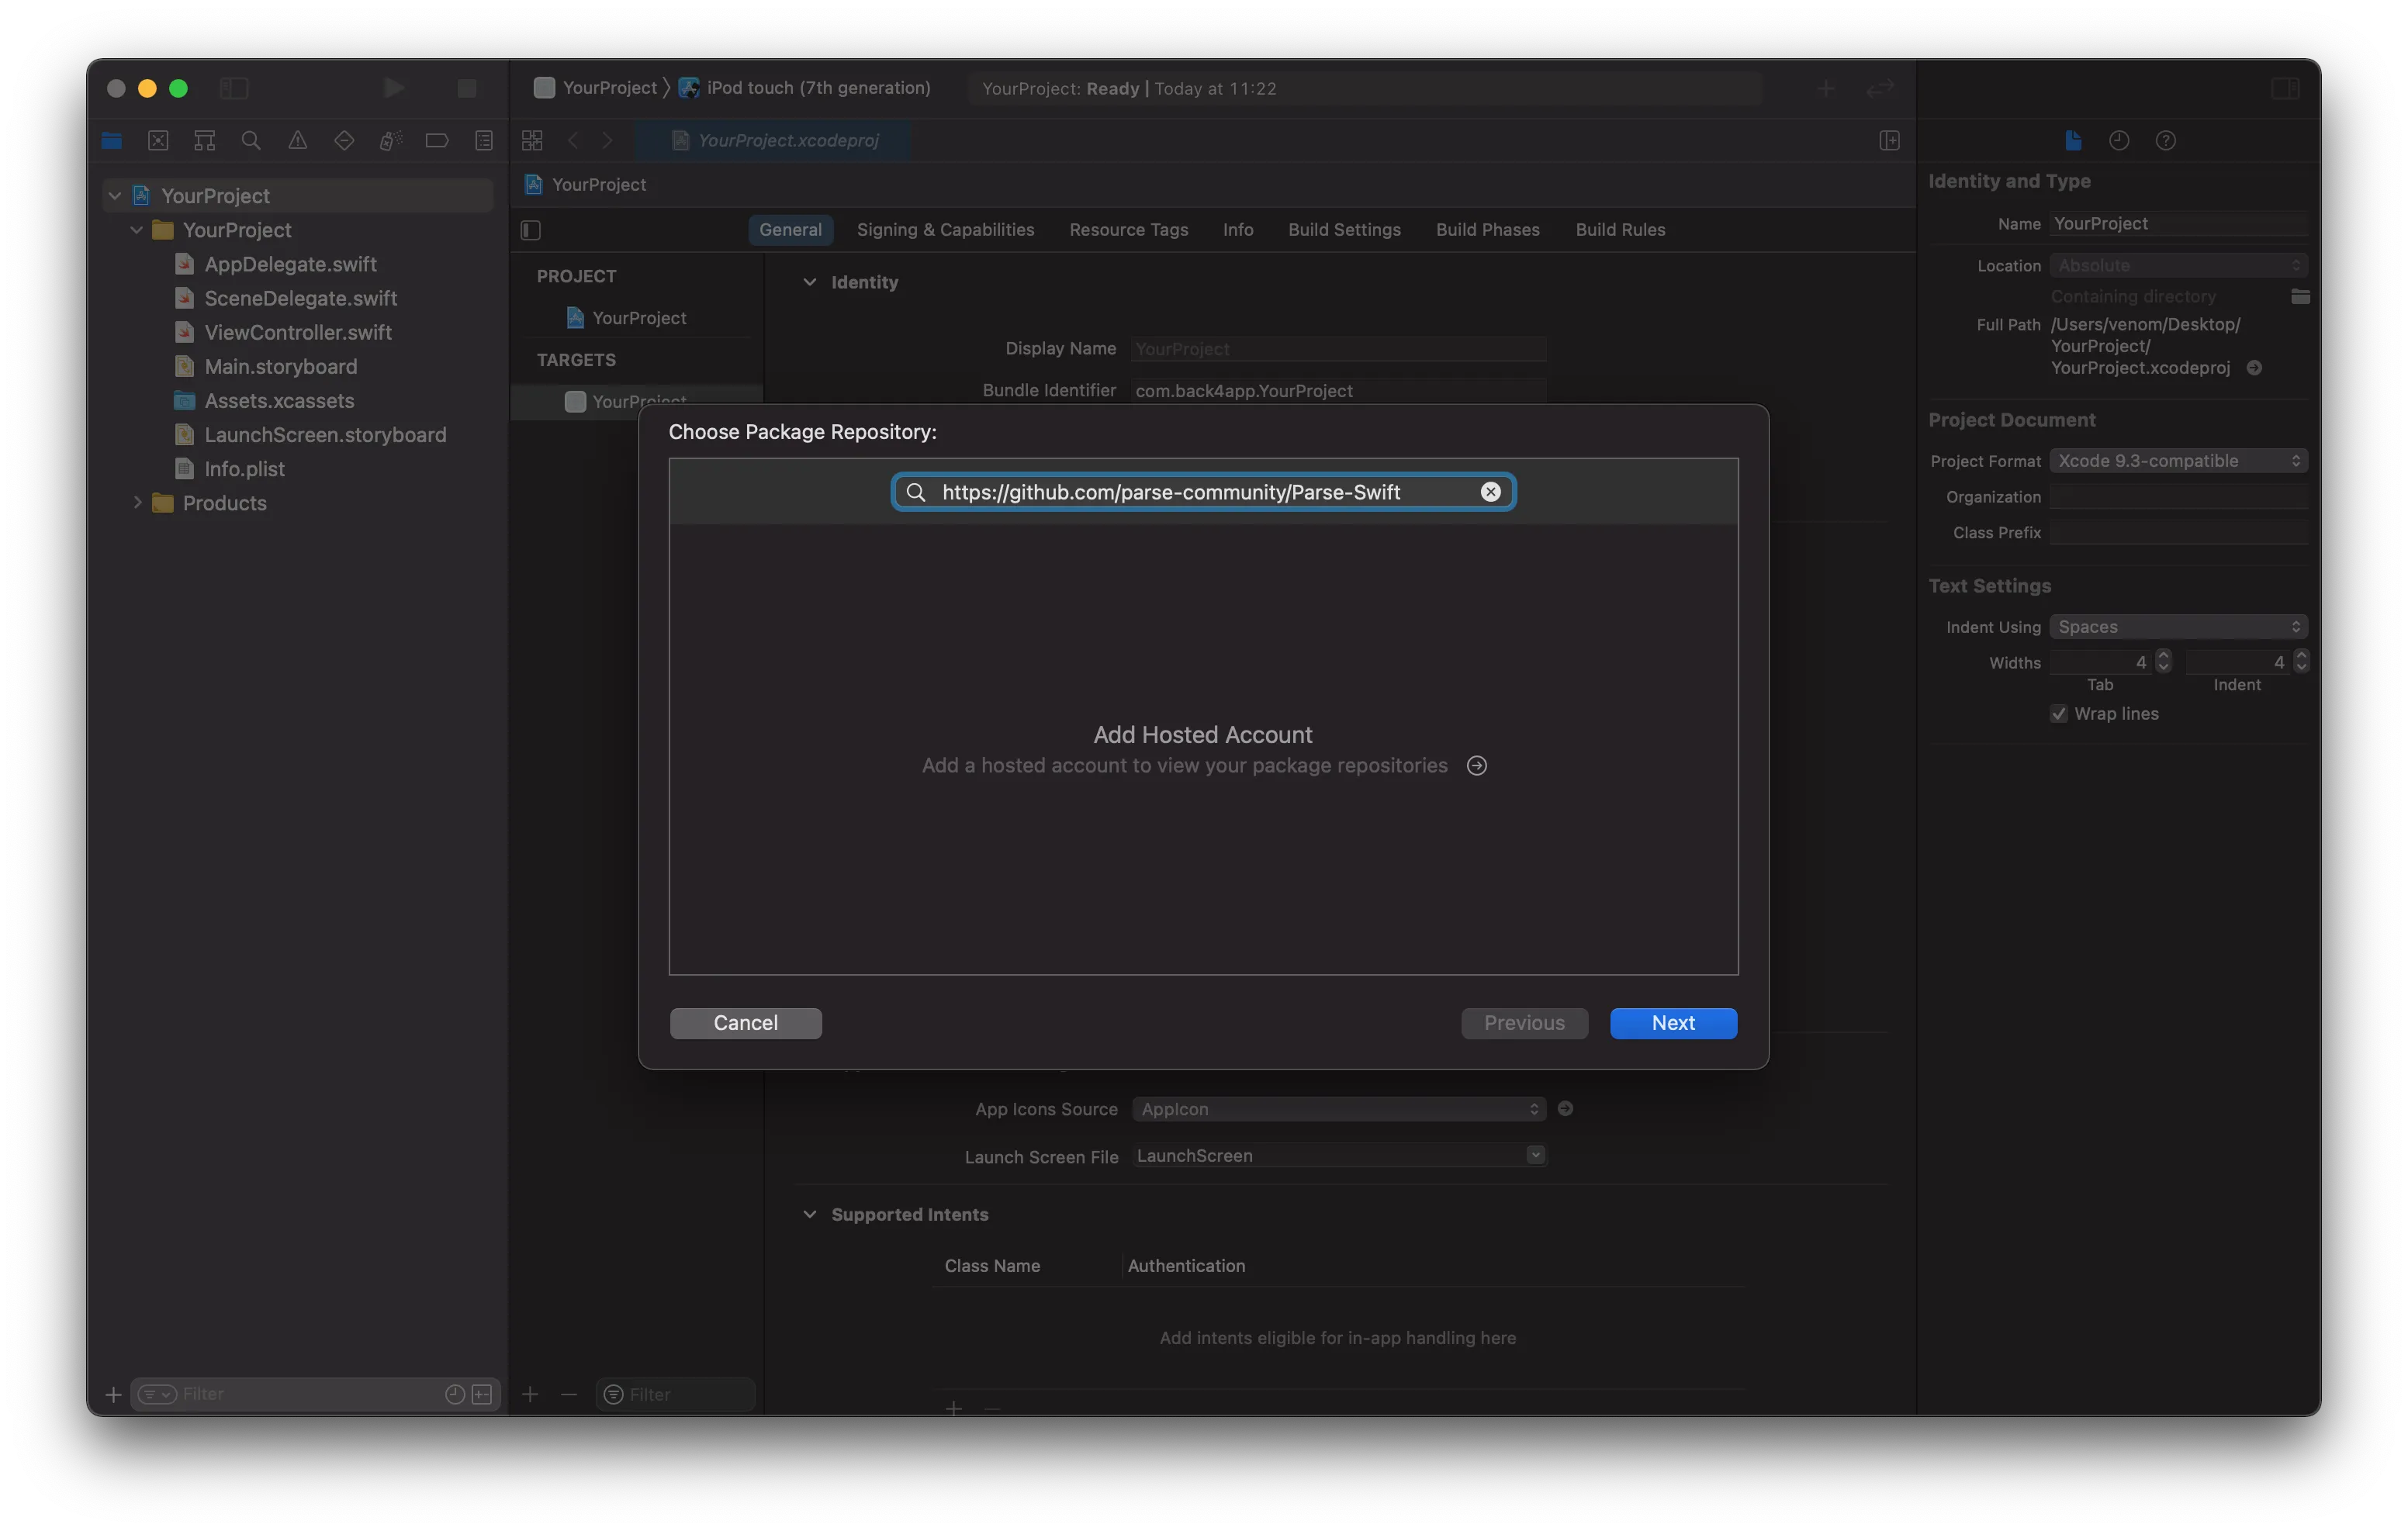
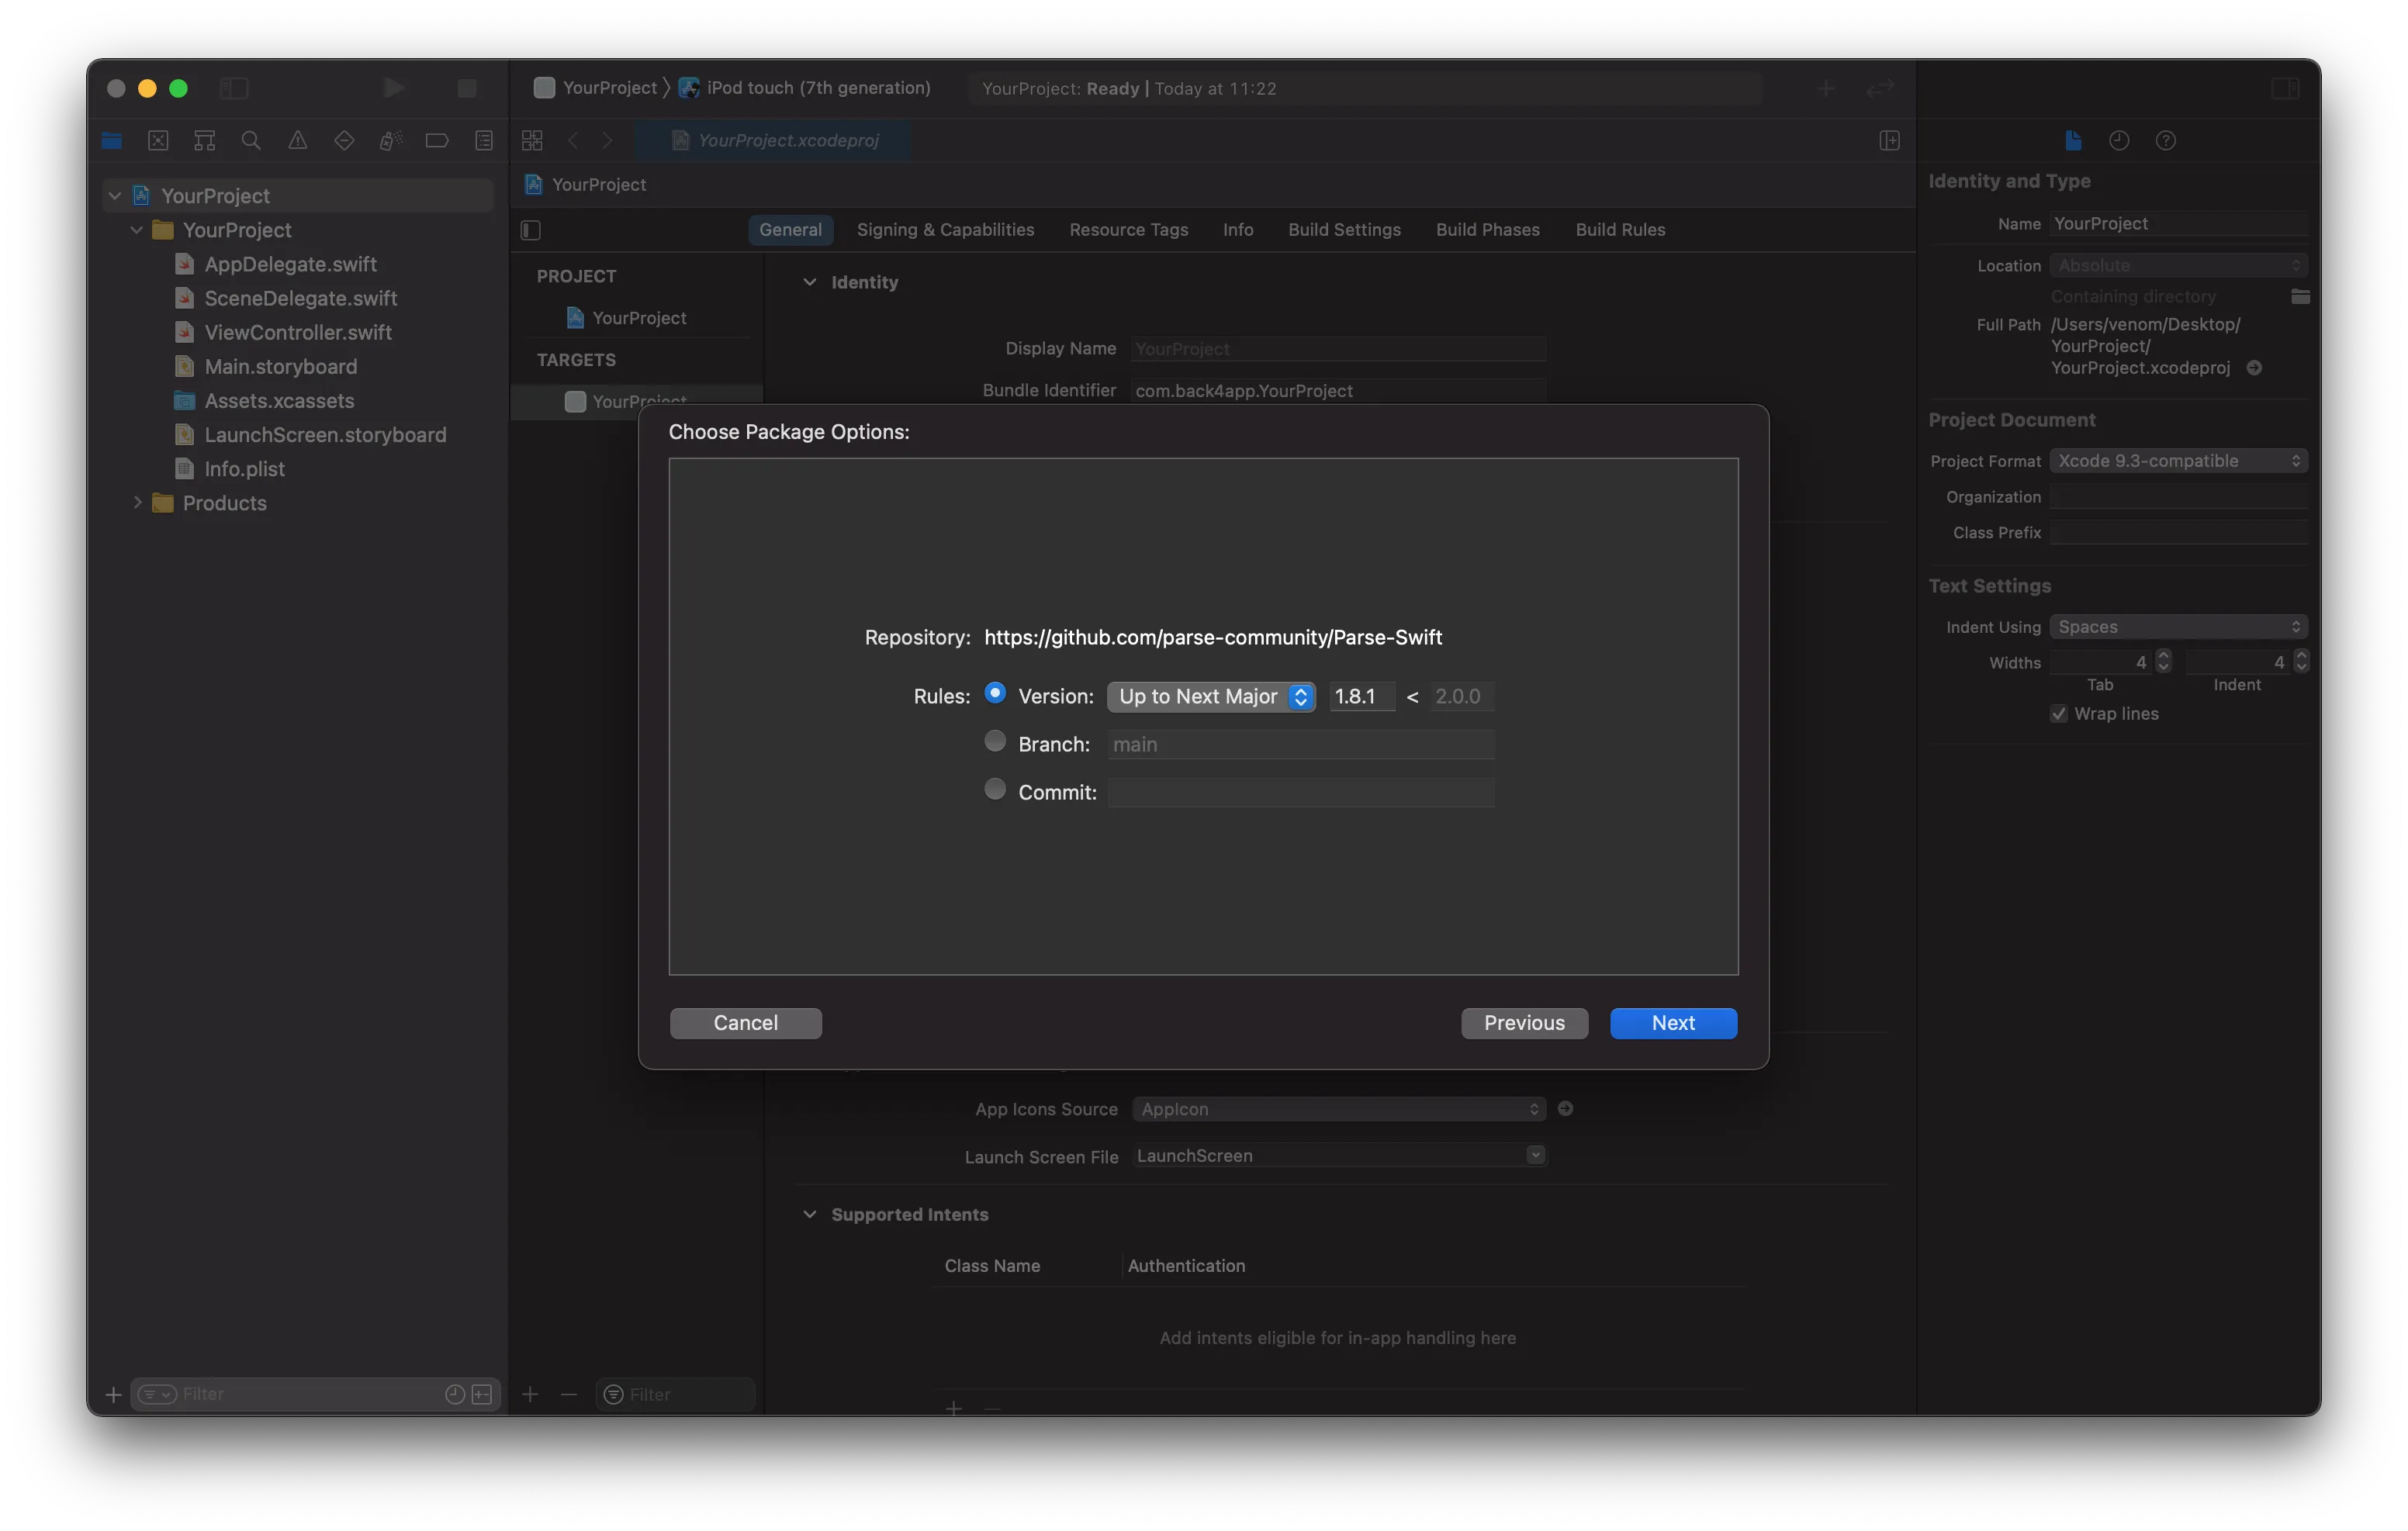
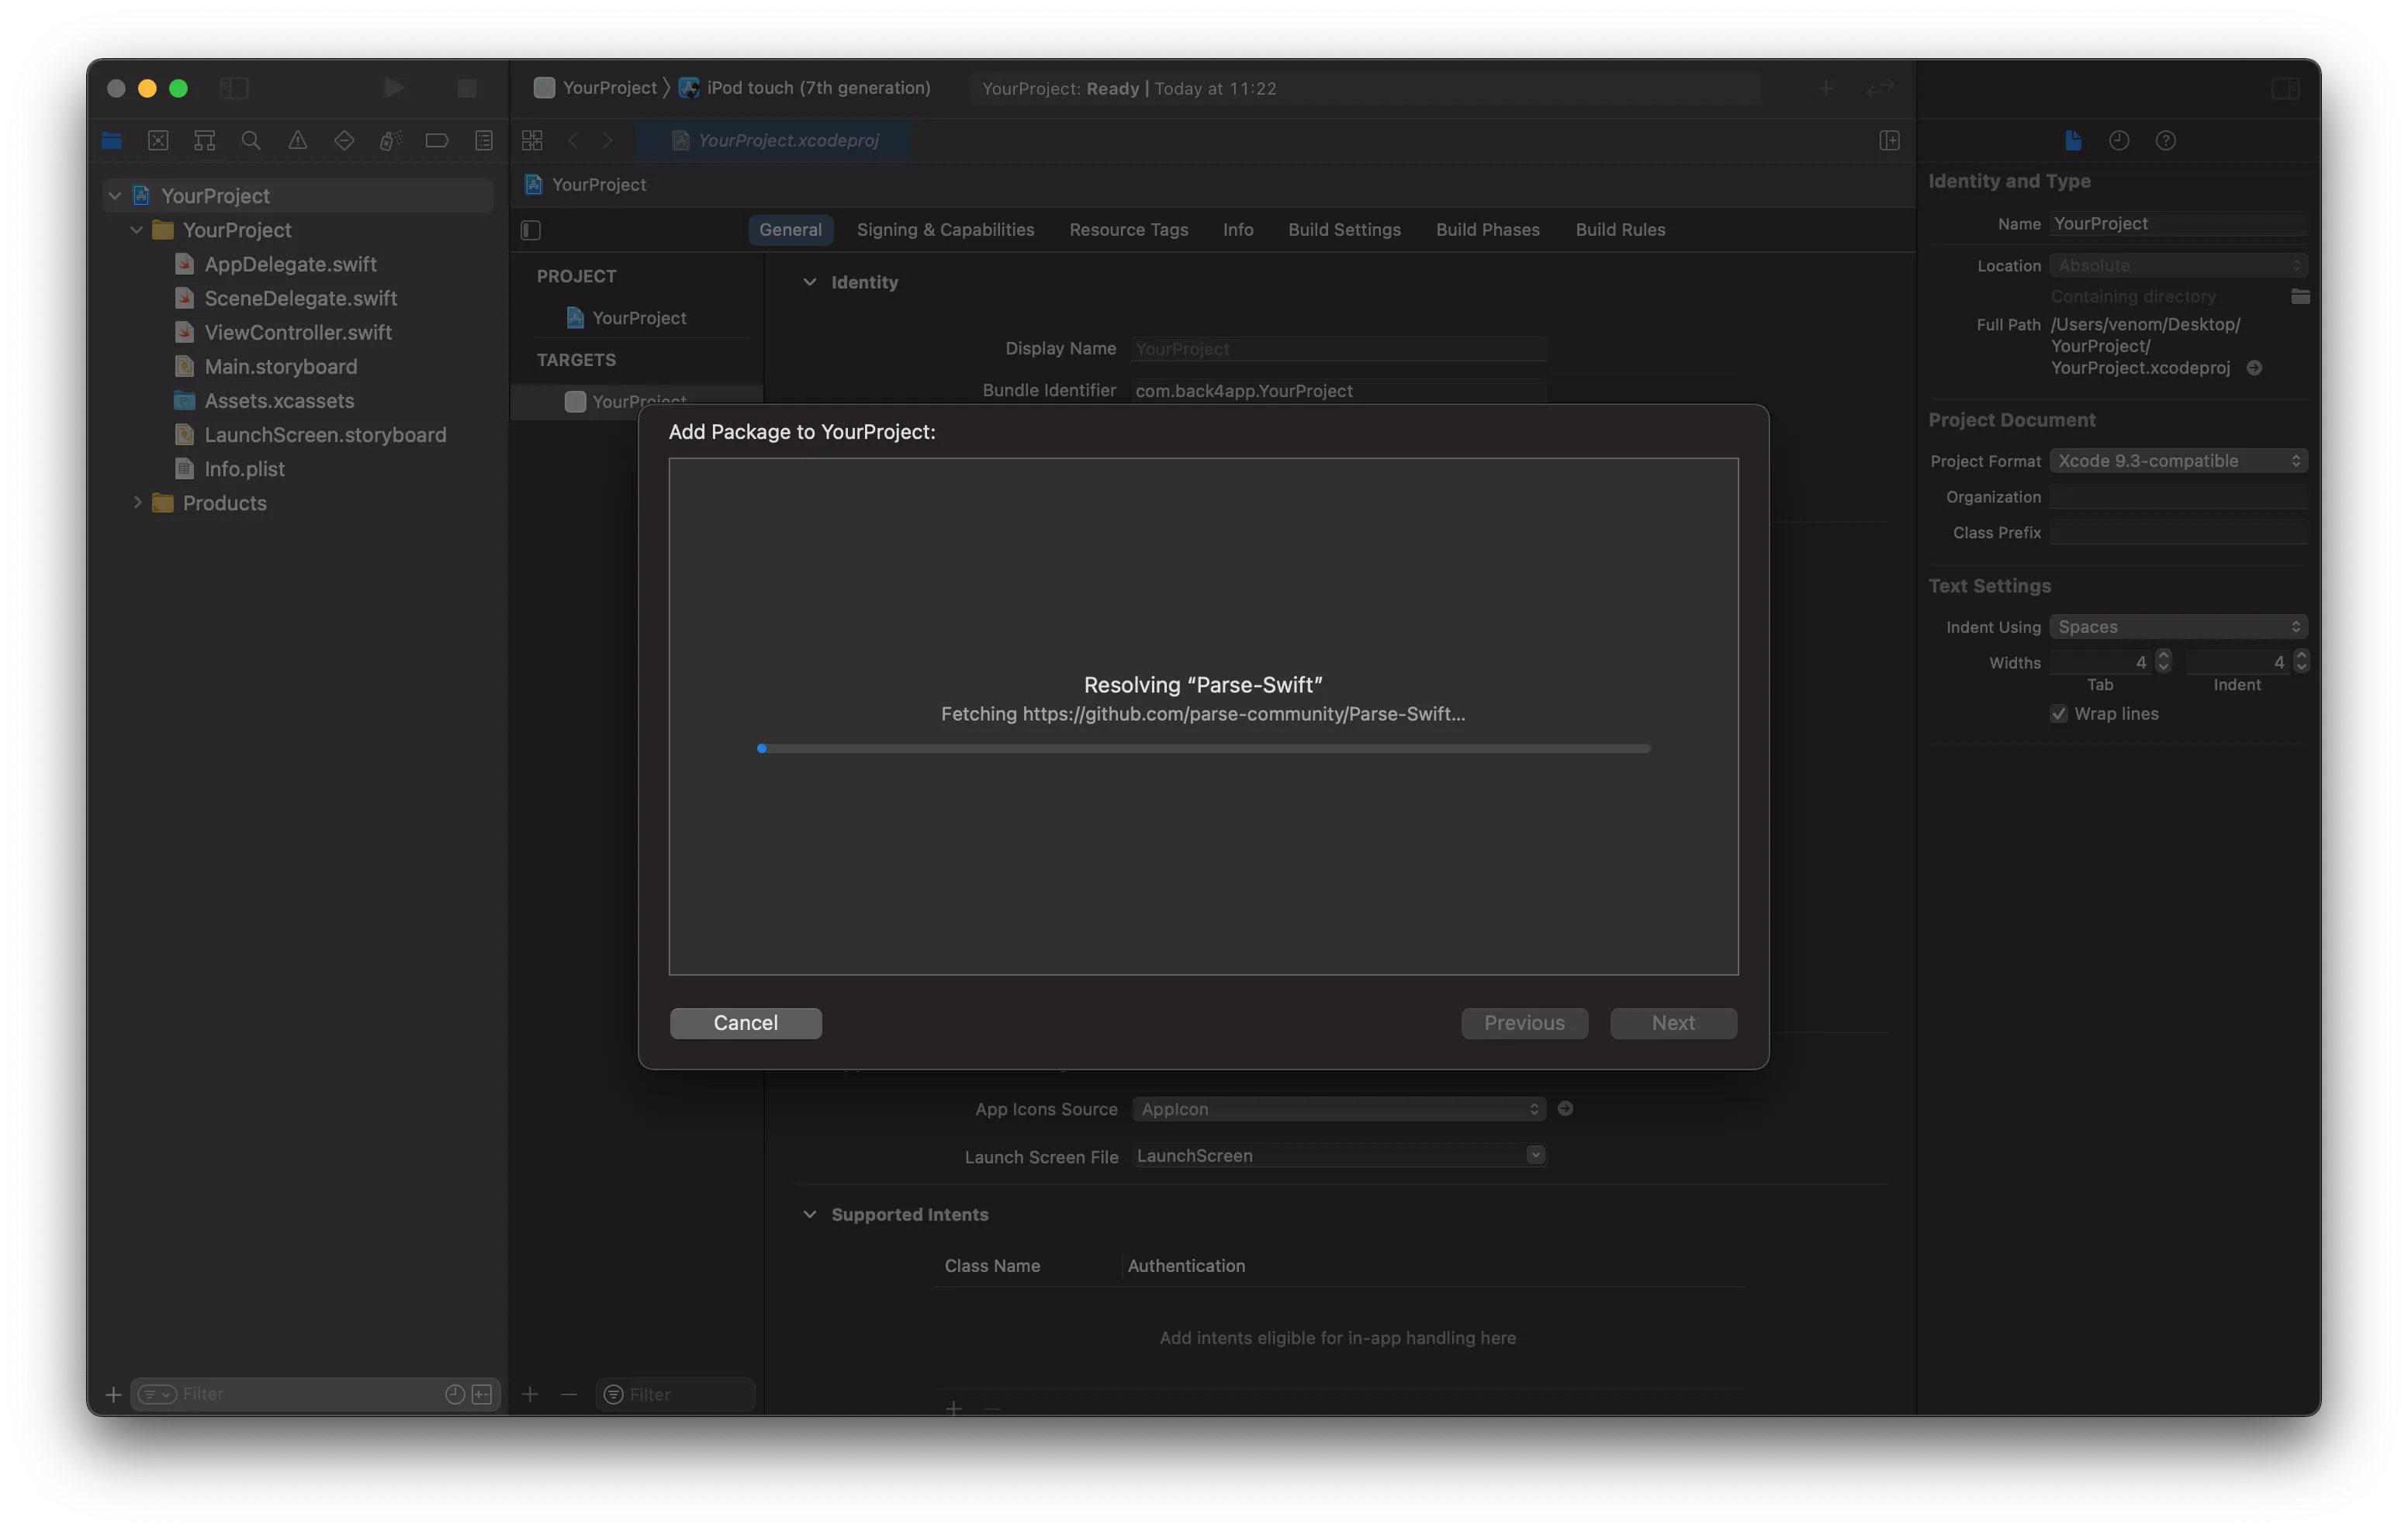
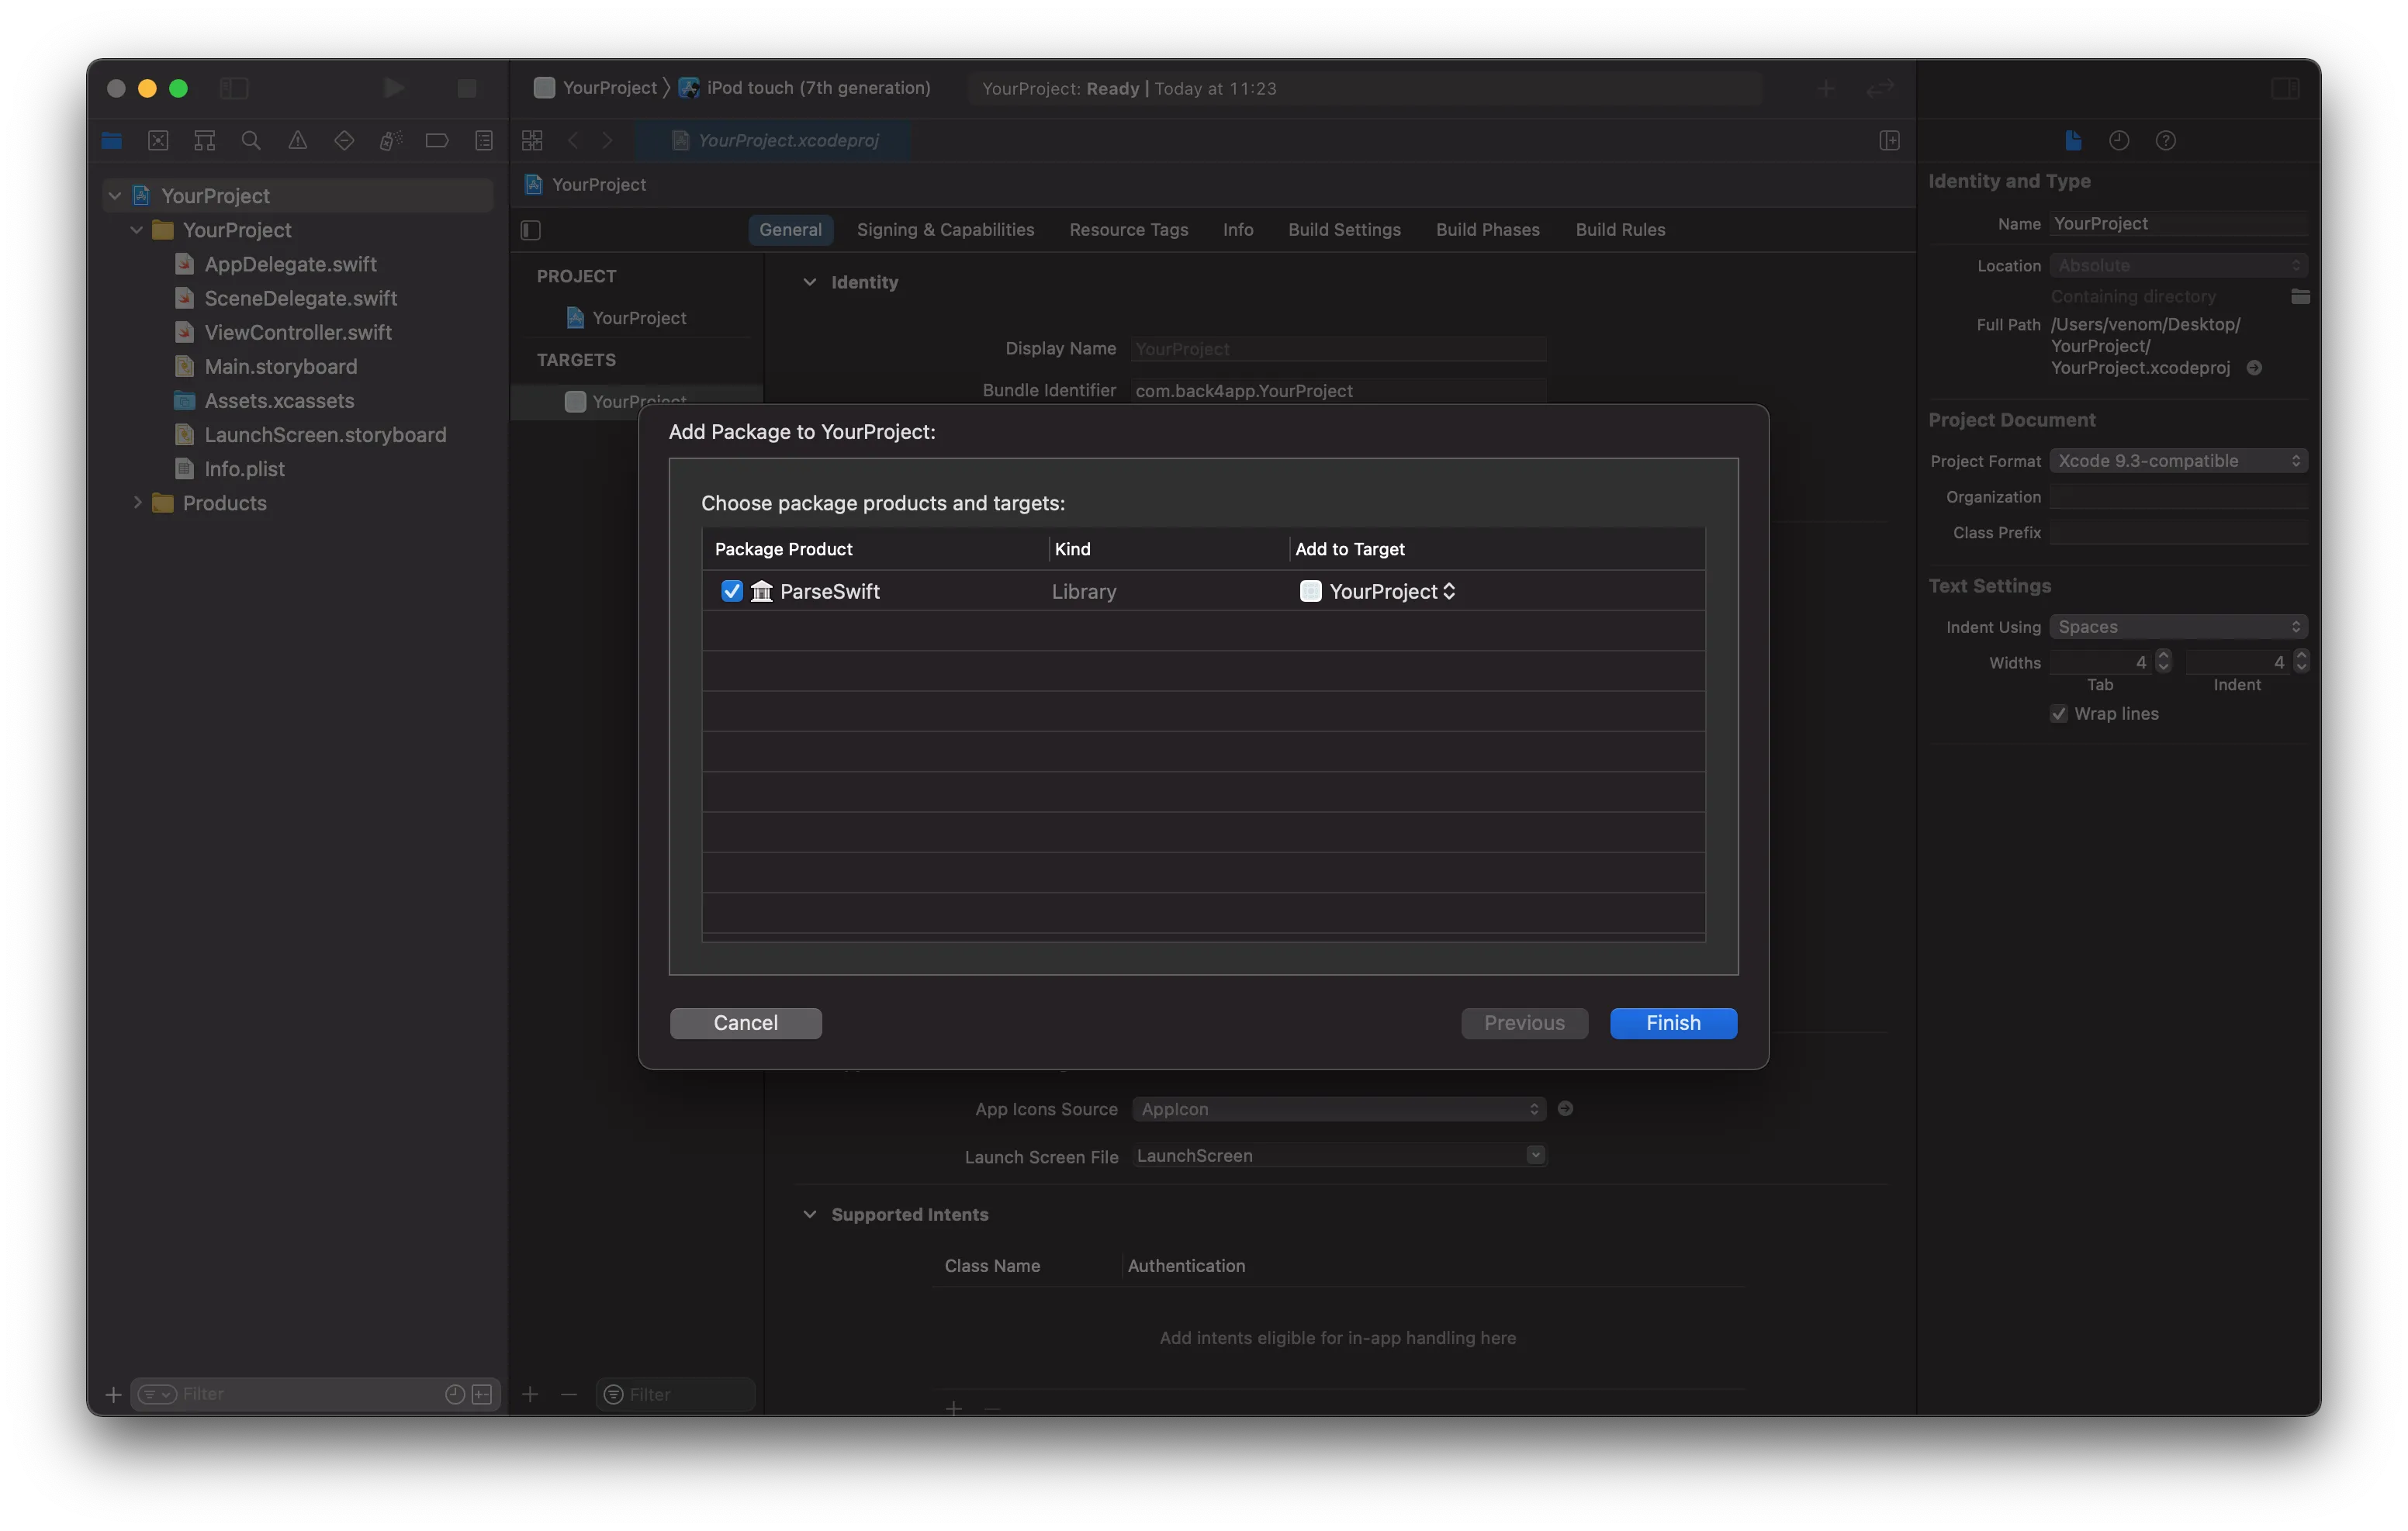
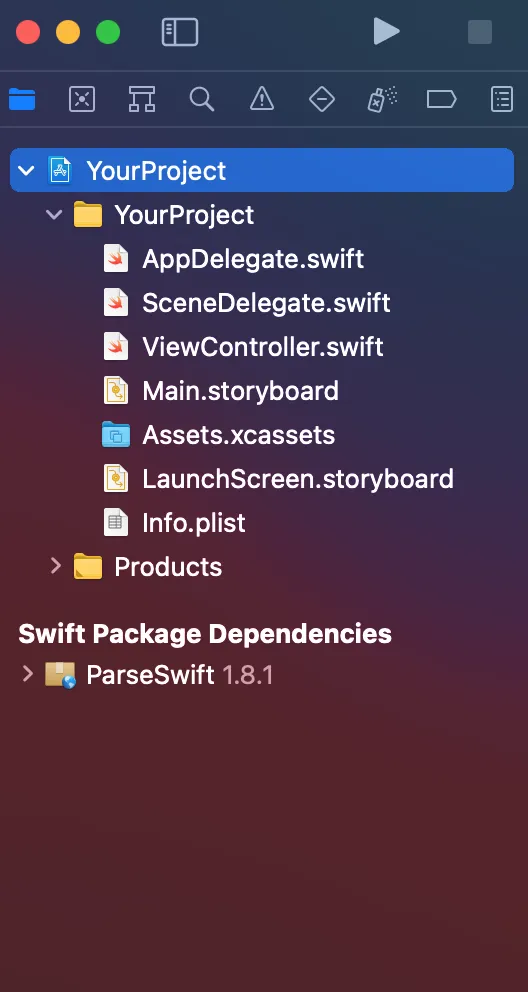
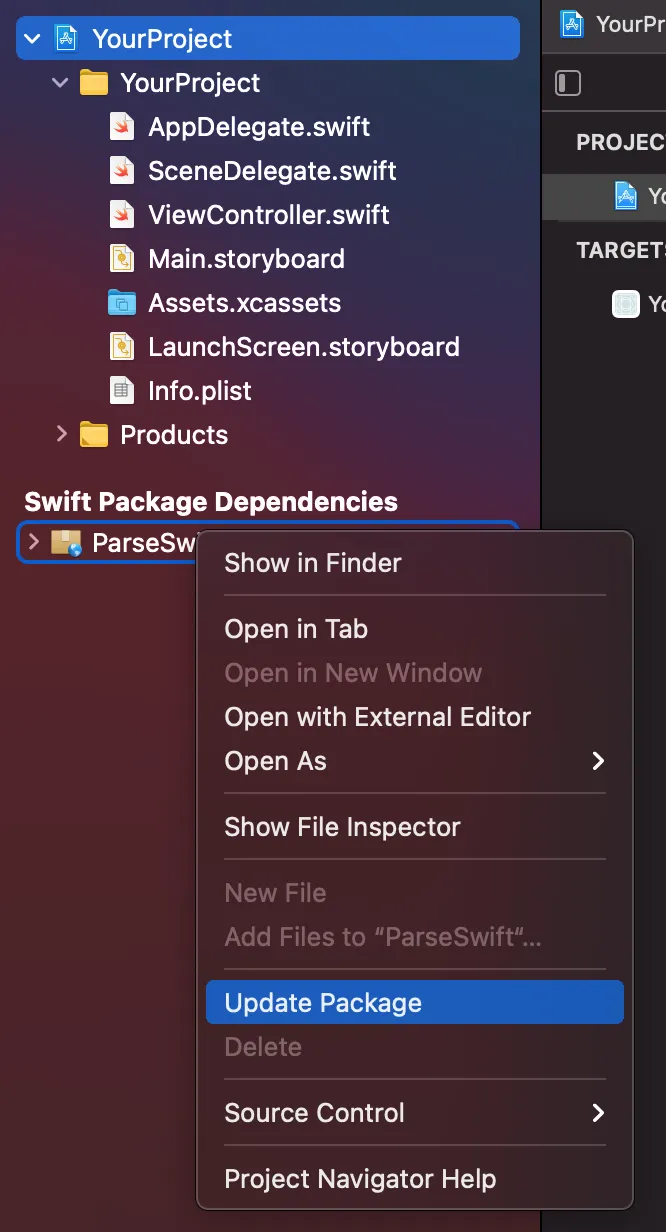
1.1 - Install the Parse Swift iOS SDK
Follow this step if you haven’t yet installed Parse Swift iOS SDK.
Xcode can use CocoaPods as dependency manager for Swift and Objective-C Cocoa projects.
You can refer to CocoaPods Getting Started Guide for additional details.
To install CocoaPods, open your terminal, copy the following code snippet and paste it in to your terminal and hit return:
CocoaPods should install automatically after you enter your password. If there’s a problem you may need to upgrade your local version of Ruby.
Next open up the Xcode Project folder and open a terminal window in that folder.
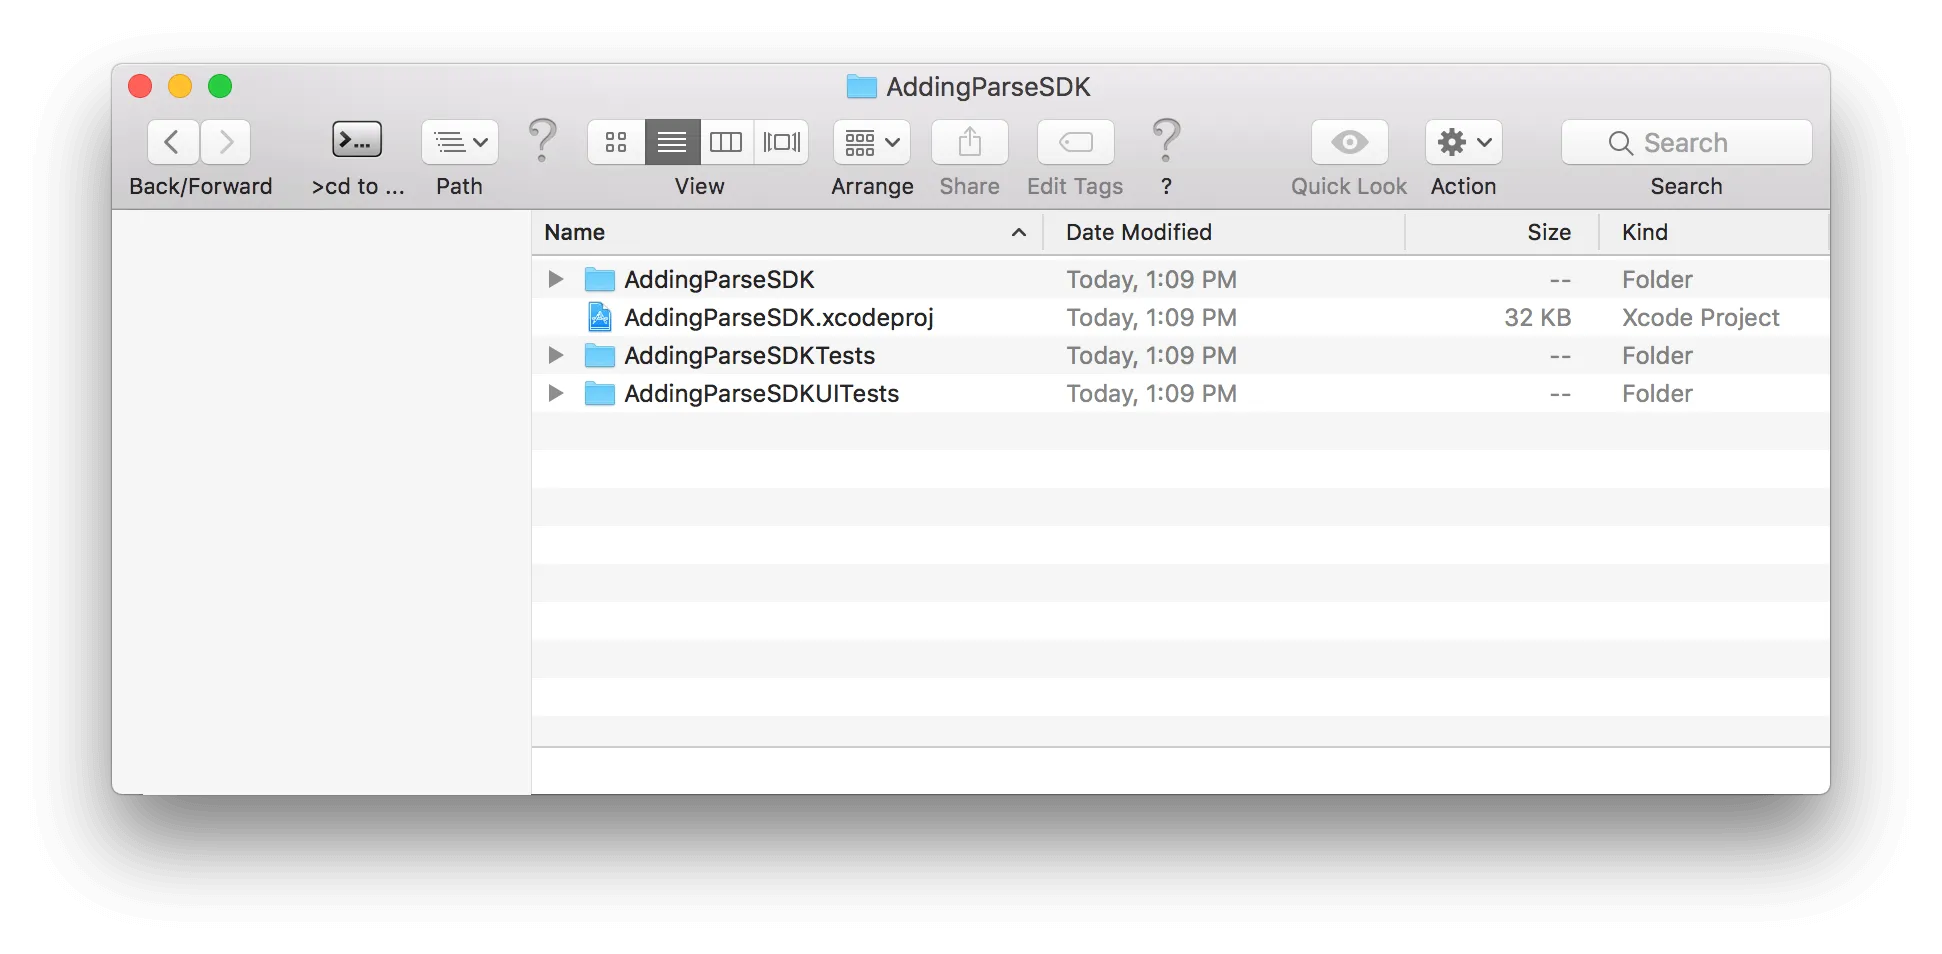
Now you are going to create a Podfile. Copy the following code snippet and paste it in to your terminal and hit return:
If your folder now shows your Podfile you did it correctly.
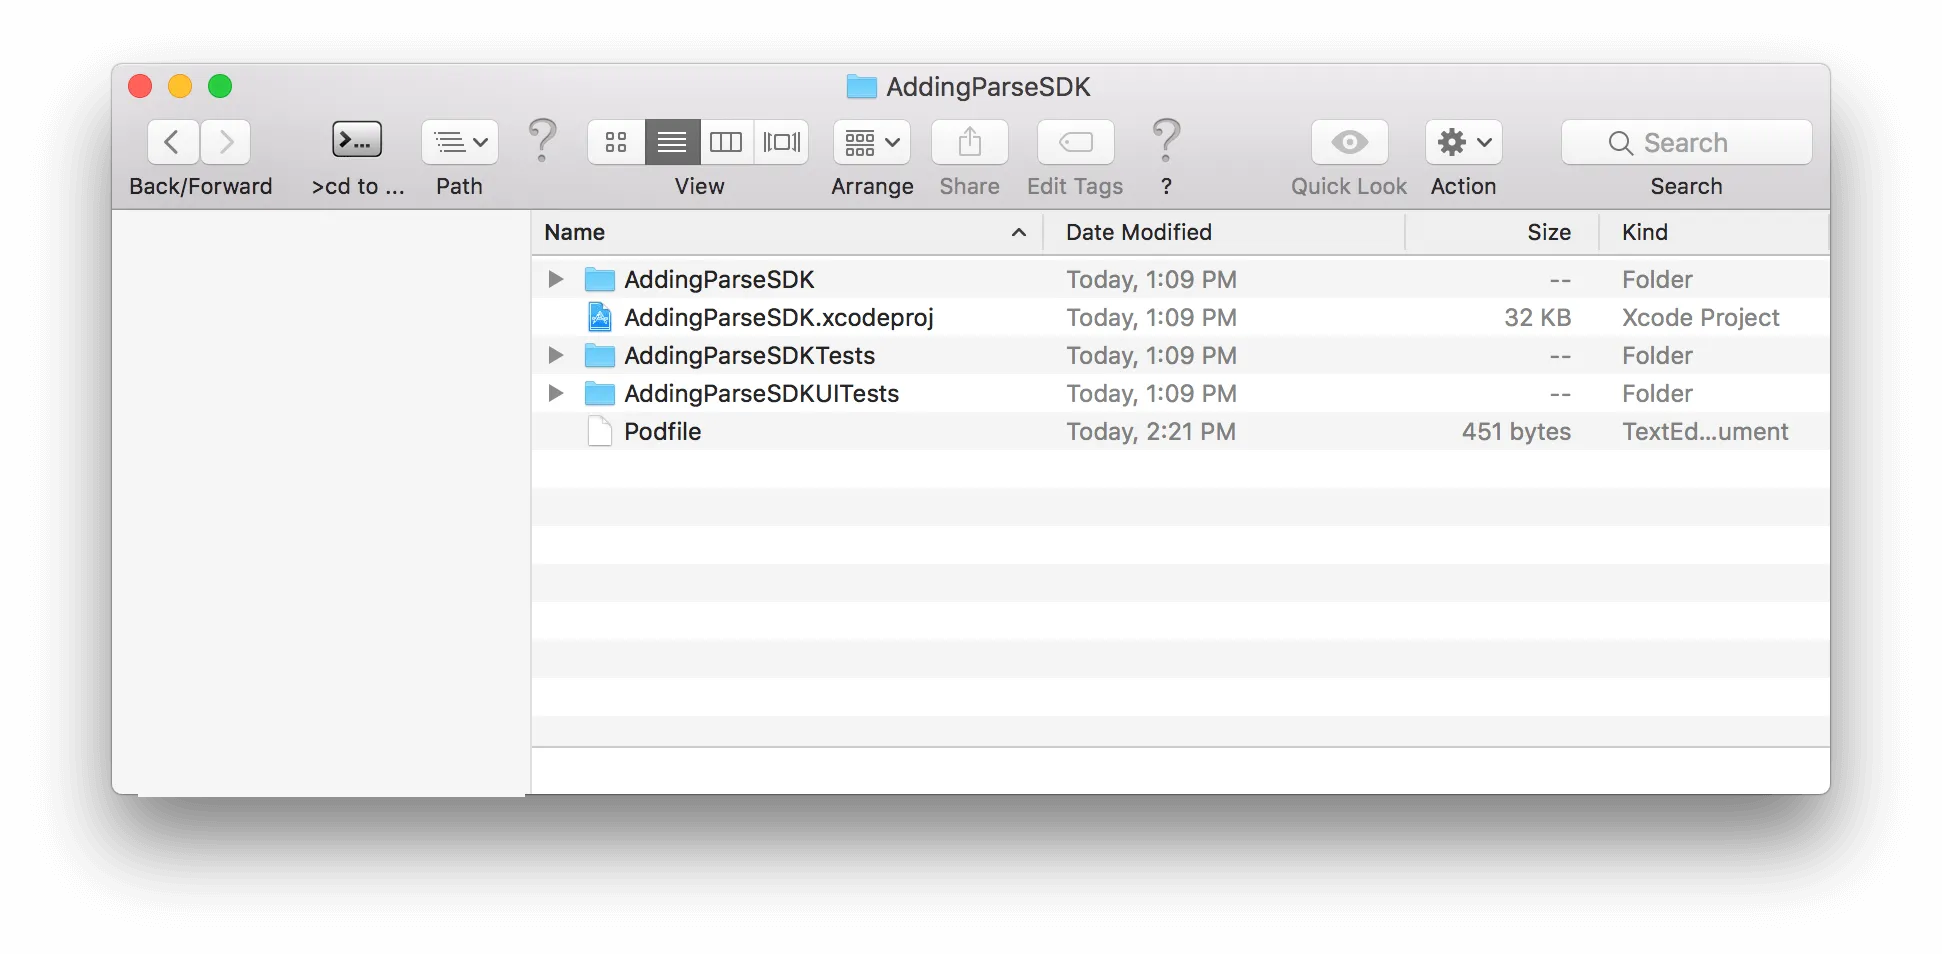
Be careful, If you don’t see the podfile make sure your terminal is actually inside the project folder..
Next open your Podfile with Xcode or any text editor and under each target add “pod ‘Parse’”.
Your Podfile will look similar to this:
Now you are going to add Parse Swift to your project. Make sure your terminal is opened to your project folder. Copy the following code snippet and paste it in to your terminal and hit return:
CocoaPods will rebuild the project as a workspace and your project will now look like this.
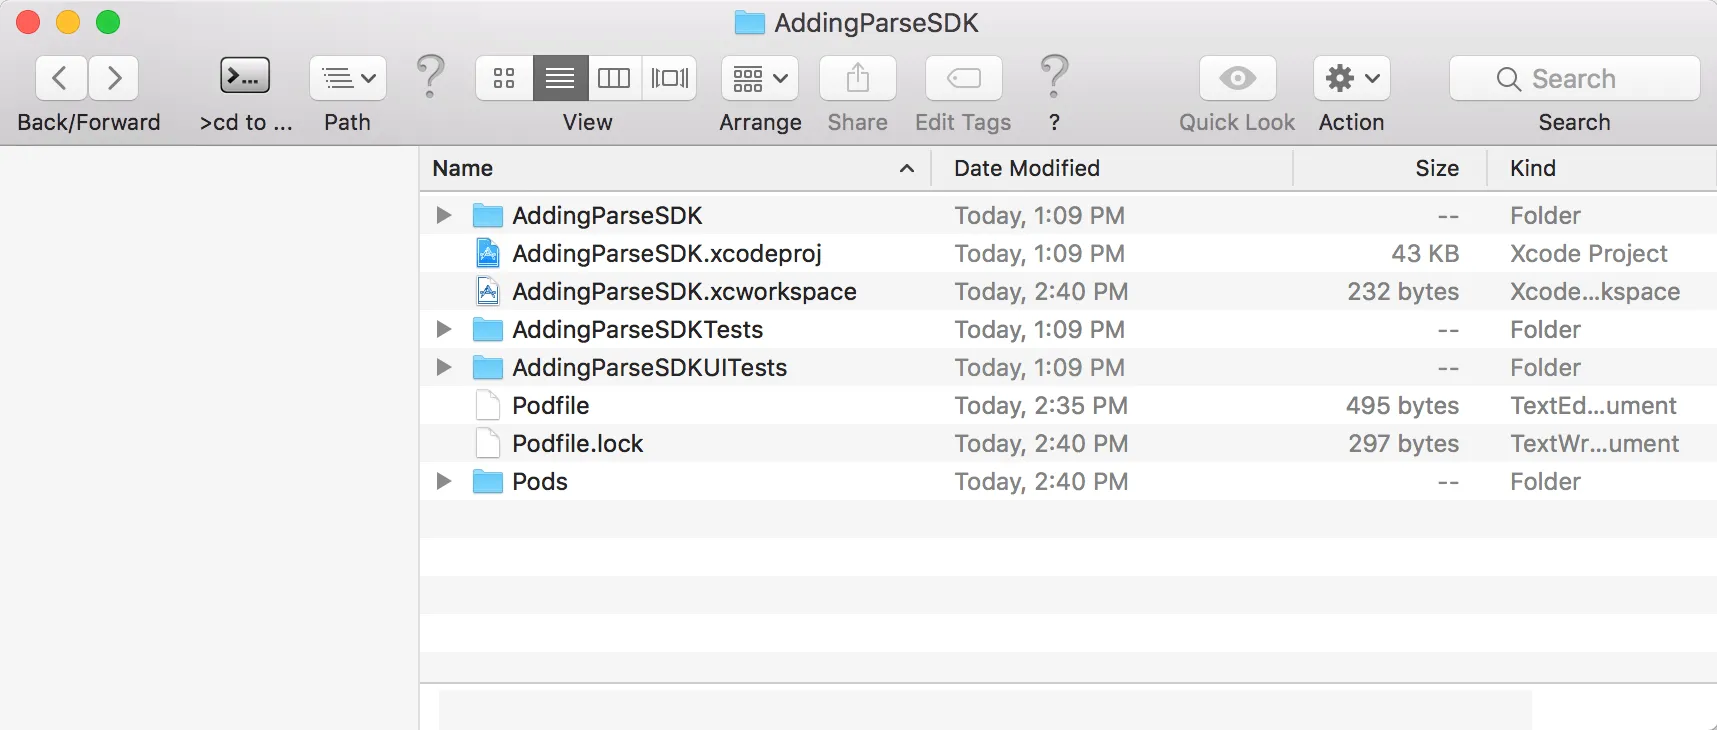
If you have already opened your Xcode project close it. From now on you’ll open the workspace file instead of the project file. Double click on the workspace file to open it.
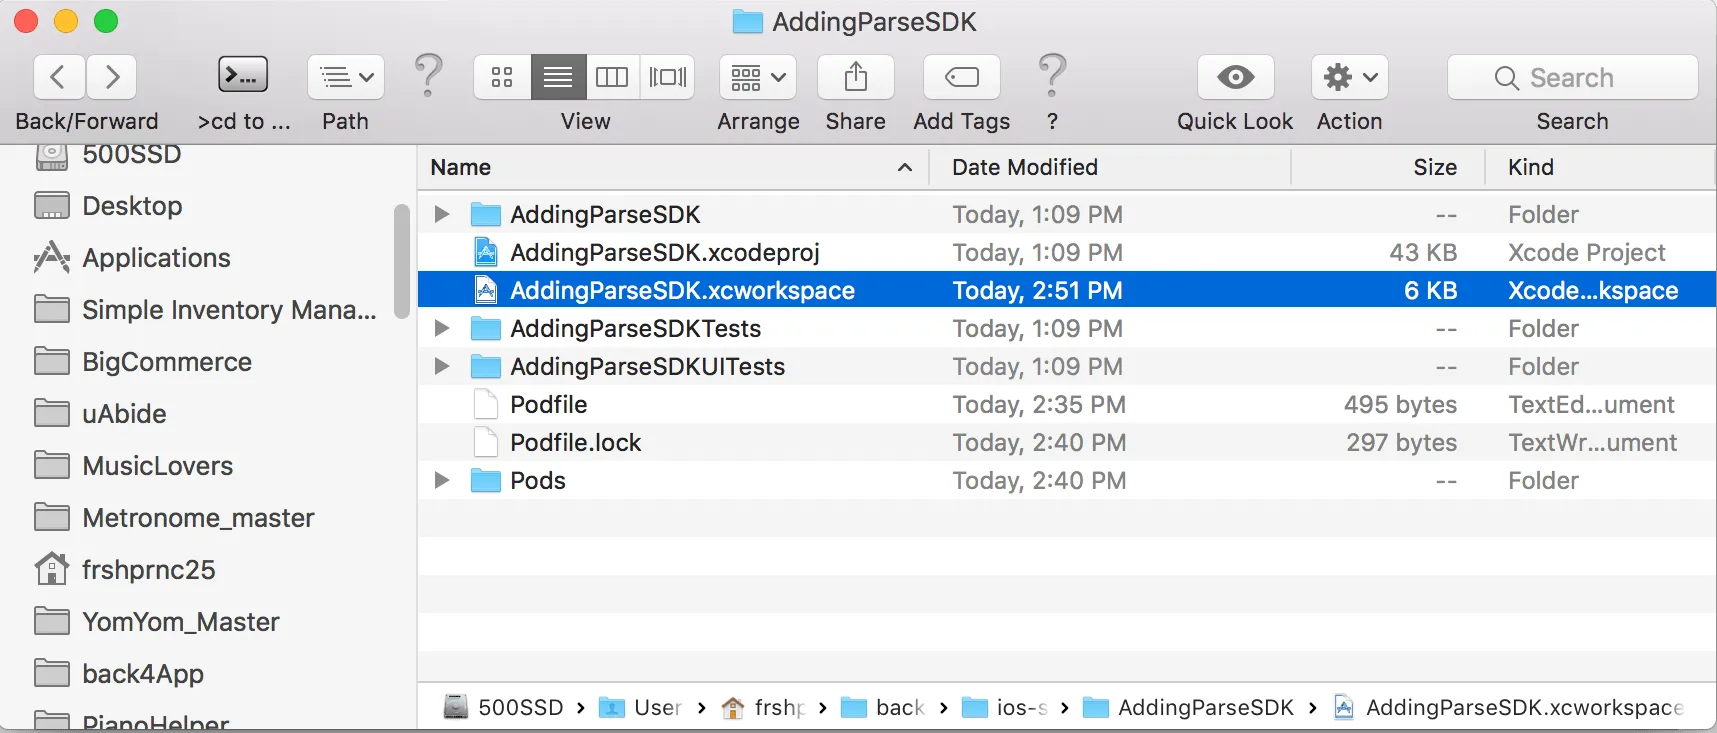
Congratulations! You have now installed the Parse iOS SDK
2 - Connect your Parse App
- Open your project’s AppDelegate.swift file to set up the app’s credentials.
- Parse Swift iOS SDK uses these settings to connect to the Back4App servers.
- At the top of the file you should see a function called ‘didFinishLaunchingWithOptions’.
- Paste the following code snippet inside this function, and make sure it is above the line that says ‘return true’.
1 ParseSwift.initialize(applicationId: "PASTE_YOUR_APPLICATION_ID_HERE", clientKey: "PASTE_YOUR_CLIENT_ID_HERE", serverURL: URL(string: "https://parseapi.back4app.com")!)At the top of your AppDelegate.swift file make sure to include Parse as a module by including the follwing code snippet right below ‘import UIKit’.
1 import ParseSwiftYour AppDelegate.swift file should now look like this:
1   import UIKit
2   import ParseSwift
3
4   @main
5   class AppDelegate: UIResponder, UIApplicationDelegate {
6
7
8
9       func application(_ application: UIApplication, didFinishLaunchingWithOptions launchOptions: [UIApplication.LaunchOptionsKey: Any]?) -> Bool {
10          // Override point for customization after application launch.
11          ParseSwift.initialize(applicationId: "PASTE_YOUR_APPLICATION_ID_HERE", clientKey: "PASTE_YOUR_CLIENT_ID_HERE", serverURL: URL(string: "https://parseapi.back4app.com")!)
12          return true
13      }
14
15      // MARK: UISceneSession Lifecycle
16
17      func application(_ application: UIApplication, configurationForConnecting connectingSceneSession: UISceneSession, options: UIScene.ConnectionOptions) -> UISceneConfiguration {
18          // Called when a new scene session is being created.
19          // Use this method to select a configuration to create the new scene with.
20          return UISceneConfiguration(name: "Default Configuration", sessionRole: connectingSceneSession.role)
21      }
22
23      func application(_ application: UIApplication, didDiscardSceneSessions sceneSessions: Set<UISceneSession>) {
24          // Called when the user discards a scene session.
25          // If any sessions were discarded while the application was not running, this will be called shortly after application:didFinishLaunchingWithOptions.
26          // Use this method to release any resources that were specific to the discarded scenes, as they will not return.
27      }
28
29
30  }
Be careful, If Xcode tells you there is No Such Module ‘Parse’ there’s an easy solution. In Xcode open ‘Target > Build Settings > Search Paths > Framework Search Paths’ and then add two values: ‘$(PROJECT_DIR)’ and ‘$(inherited)’. Xcode will now be able to find your Parse module.
- Go to your App Dashboard at Back4App website.
- Navigate to app’s settings: Click on Features > Core Settingsblock> Server.
- Return to your AppDelegate.swift file and paste your applicationId and clientKey.
See more at our New Parse App guide.
3 - Test your connection
Open your ViewController.swift file.
At the top of the file make sure to include Parse as a module by including the follwing code snippet right below ‘import UIKit’.
1 import ParseSwiftInside the function called ‘viewDidLoad’ add a snippet of code below the code that configures parse.
1 testParseConnection()Then add a function below viewDidLoad() method.
1	    struct GameScore: ParseObject {
2	        //: Those are required for Object
3	        var objectId: String?
4	        var createdAt: Date?
5	        var updatedAt: Date?
6	        var ACL: ParseACL?
7
8	        //: Your own properties.
9	        var score: Int = 0
10
11	        //: Custom initializer.
12	        init(score: Int) {
13	            self.score = score
14	        }
15
16	        init(objectId: String?) {
17	            self.objectId = objectId
18	        }
19	    }
20
21	    func testParseConnection(){
22	        let score = GameScore(score: 10)
23	        let score2 = GameScore(score: 3)
24	        score.save { result in
25	            switch result {
26	            case .success(let savedScore):
27	                assert(savedScore.objectId != nil)
28	                assert(savedScore.createdAt != nil)
29	                assert(savedScore.updatedAt != nil)
30	                assert(savedScore.ACL == nil)
31	                assert(savedScore.score == 10)
32
33	                /*: To modify, need to make it a var as the value type
34	                    was initialized as immutable.
35	                */
36	                var changedScore = savedScore
37	                changedScore.score = 200
38	                changedScore.save { result in
39	                    switch result {
40	                    case .success(var savedChangedScore):
41	                        assert(savedChangedScore.score == 200)
42	                        assert(savedScore.objectId == savedChangedScore.objectId)
43
44	                        /*: Note that savedChangedScore is mutable since it's
45	                            a var after success.
46	                        */
47	                        savedChangedScore.score = 500
48
49	                    case .failure(let error):
50	                        assertionFailure("Error saving: \(error)")
51	                    }
52	                }
53	            case .failure(let error):
54	                assertionFailure("Error saving: \(error)")
55	            }
56	        }
57	    }
58 }- Build your app in a device or simulator (Command+R).
- Wait until the main screen appears.
- Find your app and click on Dashboard
- Click on Core.
- Go to Browser.
If everything works properly, you should find a class named GameScore and the saved objects in it.
Next Steps
At this point, you have learned how to get started with iOS apps. You are now ready to explore Parse Server core features and Back4App add-ons.
Learn more by walking around our iOS Tutorials or check Parse open source documentation for iOS SDK.