Sign in with Twitter
How to add twitter login to your Android App
Introduction
This section explains how you can create an app with user registration using Twitter Login and Parse Server core features through Back4App.
It will look like this:

At any time, you can access the complete Android Project built with this tutorial at our GitHub repository.
Prerequisites
To complete this tutorial, we need:
- An app created on Back4App.
- An android app connected to Back4App.
- Note: Follow the Install Parse SDK tutorial to create an Android Studio Project connected to Back4App.
1 - Twitter Set up
To start using Twitter functions, you need to:
- Go to Twitter Application Management Website, sign in with a Twitter account and click on Create New App.
- Fill in the Application Details. When asked to specify Callback URLs, please insert twittersdk://. This is mandatory in order to enable authentication through Twitter.
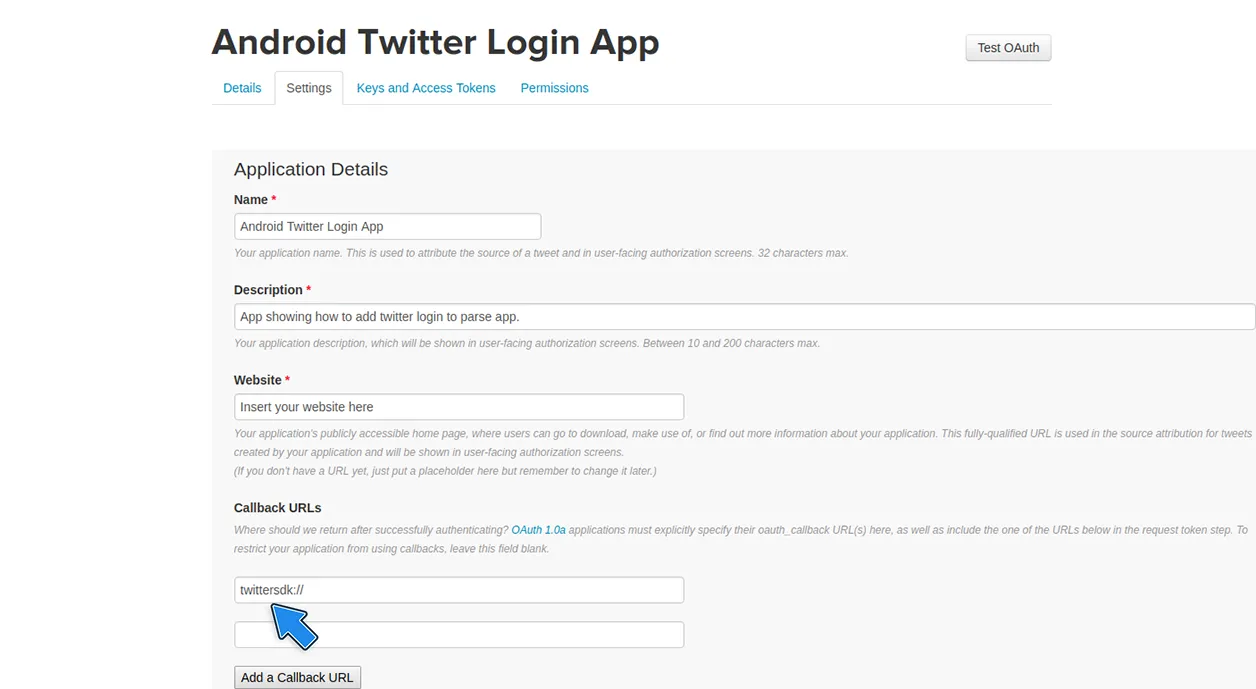
3. Click on the Developer Agreement and then on Create your Twitter application.
4. Open your Android Studio Project, find your build.gradle (Module: app) and in the dependencies{} section add the following code to install the Parse Twitter Utils SDK for Android.
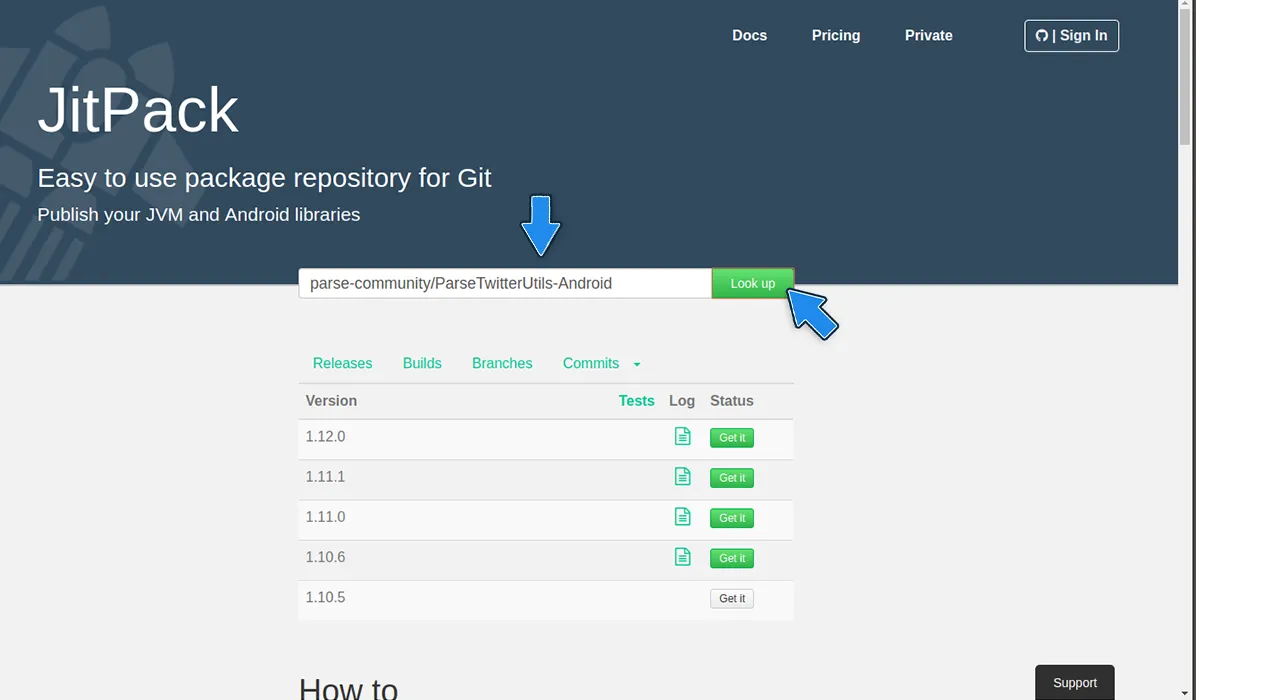
Remember to update the version of Parse Facebook Utils SDK for Android to the latest one. You can find out which is the latest version at the JitPack website, following these steps:
- At JitPack website paste parse-community/ParseTwitterUtils-Androidin the Git repo urlbox.
- After doing that, click on the Look upbutton. Then you should see the available versions of Parse Twitter Utils SDK for Android, as shown in the following image.
2 - Link your Twitter App with Back4App
- In your Android Studio Project, in the Java file called App that extends Application that you created to initialize the Parse SDK, on its onCreatemethod, right after Parse.initialize()call, use the following code to initialize Parse Twitter Utils SDK.
1 ParseTwitterUtils.initialize(getString(R.string.twitter_consumer_key), getString(R.string.twitter_consumer_secret));If you don’t have an App.java file as described in this step, access the Install Parse SDK for Android documentation and make sure that you have followed all the steps required to install Parse SDK correctly. If you do not install Parse SDK properly your facebook login with Parse will not work.
2. Go to app > res > values > strings.xml file.
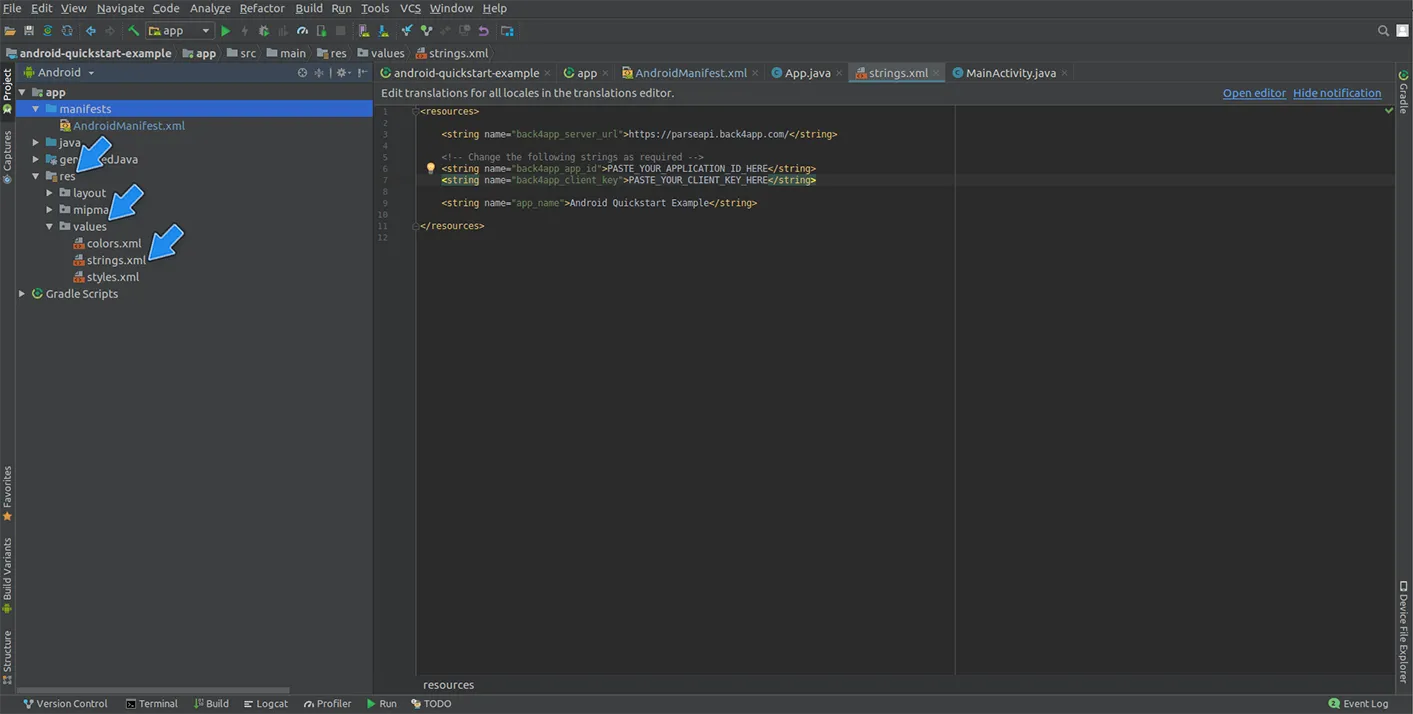
- In the strings.xml file add the following code:
2. Leave the string.xml opened and go to Back4App Website, log in and click on My Apps. Find your app and then click on SERVER SETTINGS.
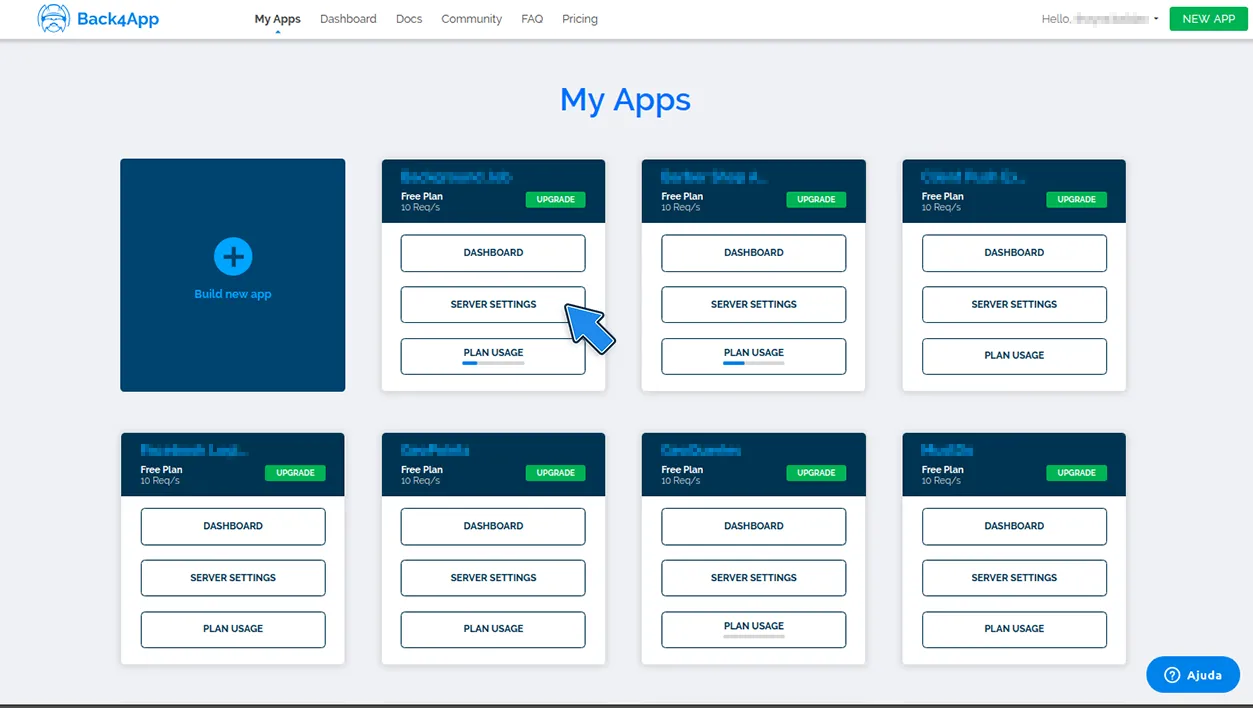
- Find the “Twitter Login” block and click on Settings. The “Twitter Login” block looks like this:
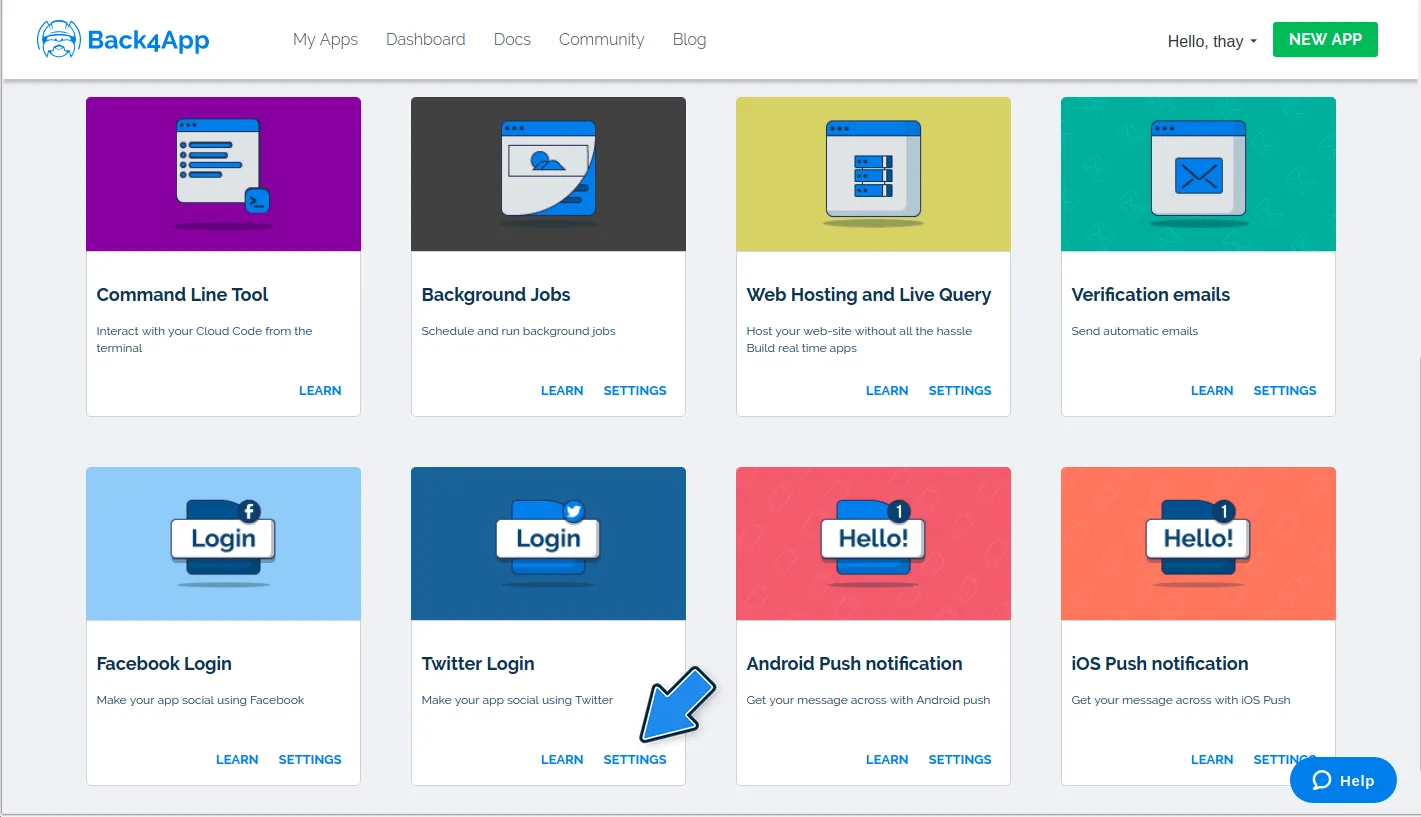
2. Leave the Back4App Twitter Login page you visited opened and go to Twitter Application Management Website find your app and click on its name.
3. Click on Keys and Access Tokens, copy the Consumer Key (API Key) and the Consumer Secret (API Secret) and paste it in the Back4App Twitter Login page, filling in the respective fields. To finish just click on SAVE. The Consumer Key (API Key) and the Consumer Secret (API Secret) looks like this:
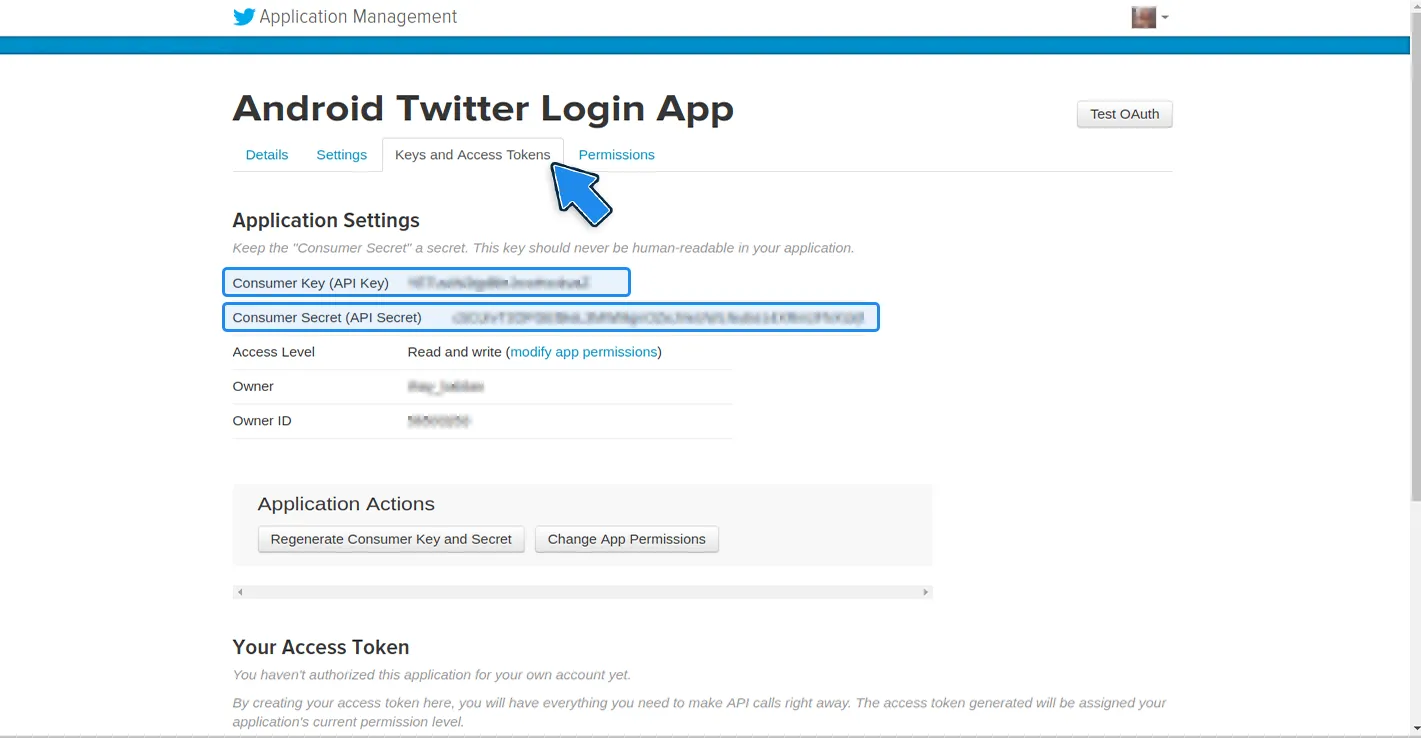
4. Also, copy the Consumer Key (API Key) and the Consumer Secret (API Secret) and paste it in the strings.xml file of your Android Studio Project.
4 - Log In
- Import to your LoginActivity:
2. To implement Twitter Login, simply use below code:
1   ParseTwitterUtils.logIn(LoginActivity.this, new LogInCallback() {
2
3        @Override
4        public void done(final ParseUser user, ParseException err) {
5            if (err != null) {
6                dlg.dismiss();
7                ParseUser.logOut();
8                Log.e("err", "err", err);
9            }
10           if (user == null) {
11               dlg.dismiss();
12               ParseUser.logOut();
13               Toast.makeText(LoginActivity.this, "The user cancelled the Twitter login.", Toast.LENGTH_LONG).show();
14               Log.d("MyApp", "Uh oh. The user cancelled the Twitter login.");
15           } else if (user.isNew()) {
16               dlg.dismiss();
17               Toast.makeText(LoginActivity.this, "User signed up and logged in through Twitter.", Toast.LENGTH_LONG).show();
18               Log.d("MyApp", "User signed up and logged in through Twitter!");
19               user.setUsername(ParseTwitterUtils.getTwitter().getScreenName());
20               user.saveInBackground(new SaveCallback() {
21                   @Override
22                   public void done(ParseException e) {
23                       if (null == e) {
24                           alertDisplayer("First tome login!", "Welcome!");
25                       } else {
26                           ParseUser.logOut();
27                           Toast.makeText(LoginActivity.this, "It was not possible to save your username.", Toast.LENGTH_LONG).show();
28                       }
29                   }
30               });
31           } else {
32               dlg.dismiss();
33               Toast.makeText(LoginActivity.this, "User logged in through Twitter.", Toast.LENGTH_LONG).show();
34               Log.d("MyApp", "User logged in through Twitter!");
35               alertDisplayer("Oh, you!","Welcome back!");
36           }
37       }
38   });
In the example project, this code is placed inside aLOGIN VIA TWITTERbutton callback.
3. It’s interesting to add some method to display Alert Dialogs and make the process look more professional. The method below does this:
1   private void alertDisplayer(String title,String message){
2           AlertDialog.Builder builder = new AlertDialog.Builder(LoginActivity.this)
3                   .setTitle(title)
4                   .setMessage(message)
5                   .setPositiveButton("OK", new DialogInterface.OnClickListener() {
6                       @Override
7                       public void onClick(DialogInterface dialog, int which) {
8                           dialog.cancel();
9                           // don't forget to change the line below with the names of your Activities
10                          Intent intent = new Intent(LoginActivity.this, LogoutActivity.class);
11                          intent.addFlags(Intent.FLAG_ACTIVITY_CLEAR_TASK | Intent.FLAG_ACTIVITY_NEW_TASK);
12                          startActivity(intent);
13                      }
14                   });
15          AlertDialog ok = builder.create();
16          ok.show();
17  }
5 - Log out
- Import to your LoginActivity:
2. To implement Twitter Logout, simply use the code below:
In the example project, this code is placed inside aLOGOUT VIA TWITTERbutton callback.
The method alertDisplayer is the same that you added in the LoginActivity, just remember to change the Intent arguments. in the strings.xml file of your Android Studio Project.
It’s done!
At this stage, you can log in, register and log out of your app with Twitter using Parse Server core features through Back4App!