Data Types
Parse Data Types on Android
Introduction
In this guide, you will learn about the Parse Datatypes using Android. You will read and save the Parse Objects on Back4App from an Android App.
Storing data on Parse is built around the ParseObject. Each ParseObject contains key-value pairs of JSON-compatible data. This data is schemaless, which means that we don’t need to specify ahead of time what keys exist on each ParseObject. We can set whatever key-value pairs we want, and our backend will store them. For example, let’s say we’re tracking high scores for a game. A single ParseObject could contain:
Keys must be alphanumeric strings, and values can be:
- String=> String
- Number(primitive numeric values such as int,double)
- Bool=> boolean
- DateTime=> java.util.Date
- Null=> JSONObject.NULL
- Array=>JSONArray
- File=> Parse File
- Pointer=> other ParseObject
- Relation=> ParseRelation
- Geopoint=> ParseGeoPoint
Each ParseObject has a class name that we can use to distinguish different sorts of data. For example, we could call the high score object a GameScore. There are also a few fields we don’t need to specify that are provided as a convenience:
- objectIdis a unique identifier for each saved object.
- createdAtand updatedAtrepresent the time that each object was created and last modified in the cloud.
Each of these fields is automatically filled in by Back4app at the moment we save a new ParseObject.
We recommend you NameYourClassesLikeThis (UpperCamelCase) and nameYourKeysLikeThis (lowerCamelCase), just to keep your code looking pretty.
This tutorial uses a basic app created in Android Studio 4.1.1 with buildToolsVersion=30.0.2 , Compile SDK Version = 30.0.2 and targetSdkVersion 30
At any time, you can access the complete Project via our GitHub repositories.
Goal
Our goal is to create an Android App that can process all data types provided by Parse Server. Here is a preview of what we are gonna achive:
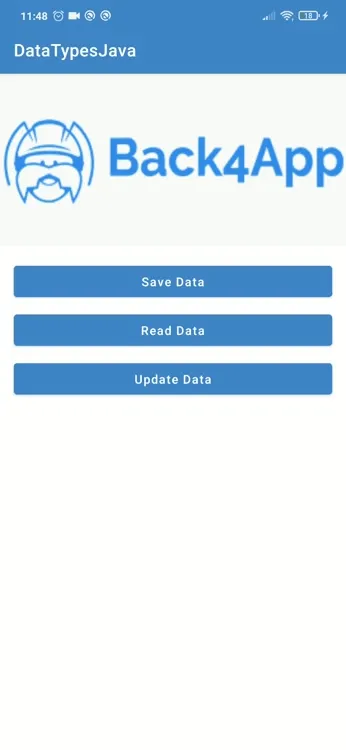
Prerequisites
To complete this tutorial, we need:
- An app created on Back4App.
- An android app connected to Back4App.
- Note: Follow the Install Parse SDK tutorial to create an Android Studio Project connected to Back4App.
Understanding our App
You will create an app for a better understanding of Parse Data Types. In this Android app, you will create all data types in a class named DataTypes and assign values to this classes variables. Then we will read and update this data.
Note The data types Pointer, Relation, File, Geopoint will be covered later in specific guides.
Let’s get started!
1 - Create App Template
Define the following variables in the MainActivity and replace the code in the onCreate method with the following code.
1     private ProgressDialog progressDialog;
2     private View popupInputDialogView;
3     private RecyclerView recyclerView;
4     private String objectId;
5     private static final String TAG = "MainActivity";
6
7     @Override
8     protected void onCreate(Bundle savedInstanceState) {
9         super.onCreate(savedInstanceState);
10        setContentView(R.layout.activity_main);
11
12        progressDialog = new ProgressDialog(MainActivity.this);
13
14        Button saveData = findViewById(R.id.saveData);
15        Button readData = findViewById(R.id.readData);
16        Button updateData = findViewById(R.id.updateData);
17
18        saveData.setOnClickListener(saveDataView -> {
19            try {
20                saveDataTypes();
21            } catch (JSONException e) {
22                e.printStackTrace();
23            }
24        });
25
26        readData.setOnClickListener(readDataView -> readObjects());
27
28        updateData.setOnClickListener(updateDataView -> updateObject());
29
30    }
Before next steps, we need to connect Back4App to our application. You should save the appId and clientKey from the Back4App to string.xml file and then init Parse in our App.java or App.kt file. Follow the New Parse App tutorial if you don’t know how to init Parse to your app.
2 - Code for Save Object
The create function will create a new object in Back4app database. We define the saveDataTypes function that we call in the onCreate function and use the following code in this function. We will save all data types with this function to the DataTypes classes object.
1  private void saveDataTypes() throws JSONException{
2      ParseObject parseObject = new ParseObject("DataTypes");
3
4         parseObject.put("stringField", "String");
5         parseObject.put("doubleField", 1.5);
6         parseObject.put("intField", 2);
7         parseObject.put("boolField", true);
8         parseObject.put("dateField", Calendar.getInstance().getTime());
9
10        JSONObject myObject = new JSONObject();
11        myObject.put("number", 1);
12        myObject.put("string", "42");
13
14        parseObject.put("jsonObject", myObject);
15
16
17        JSONArray myArray = new JSONArray();
18        myArray.put(myObject);
19        myArray.put(myObject);
20        myArray.put(myObject);
21
22        parseObject.put("jsonArray", myArray);
23
24
25        List<String> list = new ArrayList<>();
26        list.add("string1");
27        list.add("string2");
28        parseObject.put("listStringField", list);
29
30        List<Integer> listInt = new ArrayList<>();
31        listInt.add(1);
32        listInt.add(2);
33        listInt.add(3);
34        parseObject.put("listIntField", listInt);
35
36        List<Boolean> listBool = new ArrayList<>();
37        listBool.add(true);
38        listBool.add(false);
39        parseObject.put("listBoolField", listBool);
40
41        progressDialog.show();
42        parseObject.saveInBackground(e -> {
43            progressDialog.dismiss();
44            if (e == null) {
45                Toast.makeText(this, "Object created successfully...", Toast.LENGTH_SHORT).show();
46                objectId = parseObject.getObjectId();
47            } else {
48                objectId = null;
49                Toast.makeText(this, e.getMessage(), Toast.LENGTH_LONG).show();
50            }
51        });
52    }
3 - Code for Read Object
We will give the objectId variable that we have assigned in the saveDataTypes function as a parameter to the query and read the data that we have saved in the saveDataTypes function with the readObjects function.
1 private void readObjects() {
2    if (objectId == null) {
3             Toast.makeText(this, "No object. Click on the 'Save Data' button before.", Toast.LENGTH_SHORT).show();
4             return;
5         }
6
7         ParseQuery<ParseObject> query = new ParseQuery<>("DataTypes");
8
9         progressDialog.show();
10        query.getInBackground(objectId, (object, e) -> {
11            progressDialog.dismiss();
12            if (e == null) {
13                List<Data> list = new ArrayList<>();
14                list.add(new Data("Int list field",object.get("listIntField").toString()));
15                list.add(new Data("String field",object.get("stringField").toString()));
16                list.add(new Data("Double field",object.get("doubleField").toString()));
17                list.add(new Data("Int field",object.get("intField").toString()));
18                list.add(new Data("String list field",object.get("listStringField").toString()));
19                list.add(new Data("Date field",object.get("dateField").toString()));
20                list.add(new Data("Bool field",object.get("boolField").toString()));
21                list.add(new Data("List Bool field",object.get("listBoolField").toString()));
22                list.add(new Data("Json Object field",object.get("jsonObject").toString()));
23                list.add(new Data("Json Array field",object.get("jsonArray").toString()));
24
25                showDataTypes(list);
26
27            } else {
28                Toast.makeText(this, e.getMessage(), Toast.LENGTH_SHORT).show();
29            }
30        });
31 }
In this section, we have created a model class called Data. We use the data we get in the readObjects function to create objects from this model class. We give these objects as elements to the list we created in Data type. Then we give this list as a parameter to the showDataTypes function and list it in the AlertDialog.
This is the Data model.
1   public class Data {
2    private String type;
3    private String value;
4
5    public Data(String type, String value) {
6        this.type = type;
7        this.value = value;
8    }
9
10    public String getType() {
11        return type;
12    }
13
14    public Data setType(String type) {
15        this.type = type;
16        return this;
17    }
18
19    public String getValue() {
20        return value;
21    }
22
23    public Data setValue(String value) {
24        this.value = value;
25        return this;
26    }
27   }
This is the showDataTypes function.
1    private fun showDataTypes(list: List<Data>) {
2         val alertDialogBuilder = AlertDialog.Builder(this@MainActivity)
3         alertDialogBuilder.setTitle("Data types")
4         alertDialogBuilder.setCancelable(true)
5         initPopupViewControls(list)
6         //We are setting our custom popup view by AlertDialog.Builder
7         alertDialogBuilder.setView(popupInputDialogView)
8         val alertDialog = alertDialogBuilder.create()
9         alertDialog.show()
10    }
11
12    @SuppressLint("InflateParams")
13    private fun initPopupViewControls(list: List<Data>) {
14        val layoutInflater = LayoutInflater.from(this@MainActivity)
15        popupInputDialogView = layoutInflater.inflate(R.layout.custom_alert_dialog, null)
16        recyclerView = popupInputDialogView?.findViewById(R.id.recyclerView)
17        val adapter = ItemAdapter(this@MainActivity, list)
18        recyclerView?.layoutManager = LinearLayoutManager(
19            this,
20            LinearLayoutManager.VERTICAL,
21            false
22        )
23        recyclerView?.adapter = adapter
24    }
4 - Code for Update Object
The updateObject function is responsible for updating data in the object created on the saveDataTypes function. We are using objectId again for update object.
1   public void updateObject() {
2      if (objectId == null) {
3           Toast.makeText(this, "No object. Click on the 'Save Data' button before.", Toast.LENGTH_SHORT).show();
4           return;
5       }
6
7       ParseObject parseObject = new ParseObject("DataTypes");
8       parseObject.setObjectId(objectId);
9       parseObject.put("intField", 5);
10      parseObject.put("stringField", "new String");
11
12      progressDialog.show();
13
14      parseObject.saveInBackground(e -> {
15          progressDialog.dismiss();
16          if (e == null) {
17              Toast.makeText(this, "Object updated successfully...", Toast.LENGTH_SHORT).show();
18          } else {
19              Toast.makeText(this, e.getMessage(), Toast.LENGTH_SHORT).show();
20          }
21      });
22  }
5 - Using Counters
The above example contains a common use case. The intField field can be a counter that we’ll need to update continually. The above solution works, but it’s cumbersome and can lead to problems if we have multiple clients trying to update the same counter. Parse provides methods that atomically increment any number field to help with storing counter-type data. So, the same update can be rewritten as:
1    ParseObject parseObject = new ParseObject("DataTypes");
2    parseObject.setObjectId(objectId);
3    parseObject.increment("intField",1);
6 - Using Lists
Parse also provides methods to help in storing list data. There are three operations that can be used to change a list field atomically:
- setAddand setAddAll: append the given objects to the end of an array field.
- setAddUniqueand setAddAllUnique:add only the given objects which aren’t already contained in an array field to that field. The position of the insert is not guaranteed.
- removeand removeAll: removes all instances of the given objects from an array field.
6.1 - Examples with add and addAll
listStringField has the value:
Running the code below:
1        ParseObject parseObject = new ParseObject("DataTypes");
2        parseObject.setObjectId(objectId);
3        parseObject.add("listStringField","e");
4        parseObject.addAll("listStringField", Arrays.asList("e", "f", "g", "g"));
5        parseObject.save();
After this command the result of the stringList field will be:
6.2 - Examples with addUnique and addAllUnique
listStringField has the value:
Running the code below:
1        ParseObject parseObject = new ParseObject("DataTypes");
2        parseObject.setObjectId(objectId);
3        parseObject.addUnique("listStringField","e");
4        parseObject.addAllUnique("listStringField",Arrays.asList("c", "d", "e", "f"));
5        parseObject.save();
After this command the result of thestringList field will be:
No values were repeated.
6.3 - Examples with removeAll
listStringField has the value:
Running the code below:
1        ParseObject parseObject = new ParseObject("DataTypes");
2        parseObject.setObjectId(objectId);
3        parseObject.removeAll("listStringField",Arrays.asList("c", "d", "e", "f"));
4        parseObject.save();
After this command the result of thestringList field will be:
Note that it is not currently possible to atomically add and remove items from an array in the same save. We will have to call the save for every different array operation we want to perform separately.
7 - Remove single field from ParseObject
You can delete a single field from an object by using the remove operation:
1    ParseObject parseObject = new ParseObject("DataTypes");
2    parseObject.remove("stringField");
3    parseObject.save();
It’s done!
At this point, we have learned Parse Data Types on Android.