Flutter에서 파일 저장 및 검색 구현 가이드
플러터 앱에서 파일 저장하기
소개
때때로 애플리케이션은 ParseObject 내부에 저장하기에는 너무 큰 데이터를 저장해야 합니다. 가장 일반적인 사용 사례는 이미지를 저장하는 것이지만, 문서, 비디오, 음악 및 기타 이진 데이터에도 사용할 수 있습니다.
Parse에 파일을 저장하려면 항상 파일을 다른 데이터 객체와 연결해야 합니다. 그래야 객체를 쿼리할 때 이 파일 경로를 검색할 수 있습니다. 연결하지 않으면 파일은 저장되지만 Cloud에서 찾을 수 없습니다. 또한 중요한 팁은 파일에 파일 확장자가 있는 이름을 부여하는 것입니다. 이 확장자는 Parse가 파일 유형을 파악하고 적절하게 처리할 수 있도록 합니다. 또한 각 업로드는 고유 식별자를 받으므로 동일한 이름을 사용하여 여러 파일을 업로드하는 데 문제가 없습니다.
Flutter에서는 ParseFile과 ParseWebFile을 사용하여 애플리케이션 파일을 Cloud에 저장하고 검색할 수 있습니다. 이 가이드는 Back4app 클라우드 저장소를 관리하기 위해 Flutter 앱에서 파일을 저장하고 검색하는 방법을 설명합니다.
- 파일을 데이터 객체에 연결하지 않으면 파일이 고아 파일이 되어 Back4App Cloud에서 찾을 수 없습니다.
전제 조건
- Back4app에 연결된 Flutter 앱.
- Android 또는 iOS를 실행하는 장치(또는 가상 장치).
- 이 가이드 예제를 실행하려면 image_picker 플러그인을 올바르게 설정해야 합니다. 장치에 저장된 이미지에 접근하기 위해 iOS에 대한 권한을 추가하는 것을 잊지 마세요. {: .btn target=”_blank” rel=”nofollow”}. Android 및 iOS 프로젝트 설정에 대한 지침을 주의 깊게 읽으세요.
목표
Back4app에서 이미지를 업로드하고 표시하는 Flutter 갤러리 앱을 만듭니다.
1 - ParseFile 및 ParseWebFile 클래스 이해하기
이 Parse SDK for Flutter에는 세 가지 다른 파일 클래스가 있습니다.
- ParseFileBase는 이 SDK가 처리할 수 있는 모든 파일 클래스의 기초가 되는 추상 클래스입니다.
- ParseFile는 ParseFileBase를 확장하며, 기본적으로 모든 플랫폼에서 파일 클래스로 사용됩니다(웹에는 유효하지 않음). 이 클래스는 원시 파일을 저장하기 위해 File을 사용합니다.dart:io
- ParseWebFile는 Flutter Web에서 사용되는 ParseFile에 해당합니다. 이 클래스는 원시 파일을 저장하기 위해 Uint8List을 사용합니다.
파일을 조작하기 위해 ParseFileBase에서 사용할 수 있는 메서드:
- save() 또는 upload()를 사용하여 파일을 클라우드에 저장합니다.
- download()를 사용하여 파일을 검색하고 로컬 저장소에 저장합니다.
저장된 파일에서 정보를 가져오는 속성이 있습니다:
- url: 파일 URL을 가져옵니다. 파일을 저장한 후 또는 Parse.Object에서 파일을 가져온 후에만 사용할 수 있습니다.
- name: 파일 이름을 가져옵니다. 이는 사용자가 save() 메서드를 호출하기 전에 지정한 파일 이름입니다. 메서드를 호출한 후, 속성은 고유 식별자를 받습니다.
2 - 이미지 업로드
이미지를 업로드하려면 ParseFileBase 인스턴스를 생성한 다음 save 메서드를 호출하면 됩니다.
이제 우리의 upload 함수에서 그렇게 해봅시다:
1         ParseFileBase? parseFile;
2
3         if (kIsWeb) {
4           //Flutter Web
5           parseFile = ParseWebFile(
6               await pickedFile!.readAsBytes(),
7               name: 'image.jpg'); //Name for file is required
8         } else {
9           //Flutter Mobile/Desktop
10          parseFile = ParseFile(File(pickedFile!.path));
11        }
12        await parseFile.save();
위의 코드 조각은 이미지를 생성하고 저장하며, 저장이 완료된 후 ParseObject와 연결합니다. Gallery.
1      final gallery = ParseObject('Gallery')
2        ..set('file', parseFile);
3      await gallery.save();
3 - 이미지 표시하기
이미지를 표시하려면 이미지의 URL을 가져와야 합니다.
이미지를 업로드하려면 ParseFileBase 인스턴스를 생성한 다음 save 메서드를 호출하면 됩니다.
1       ParseFileBase? varFile = parseObject.get<ParseFileBase>('file');
2
3       return Image.network(
4         varFile!.url!,
5         width: 200,
6         height: 200,
7         fit: BoxFit.fitHeight,
8       );
4 - Flutter 앱에서 업로드 및 검색
이제 간단한 인터페이스를 사용하여 Flutter 앱에서 이미지를 업로드하고 표시하는 예제를 사용해 보겠습니다.
Flutter 프로젝트를 열고, main.dart 파일의 모든 코드를 정리하고 다음으로 교체하세요:
1   import 'dart:io';
2
3   import 'package:flutter/cupertino.dart';
4   import 'package:flutter/foundation.dart';
5   import 'package:flutter/material.dart';
6   import 'package:image_picker/image_picker.dart';
7   import 'package:parse_server_sdk_flutter/parse_server_sdk.dart';
8
9   void main() async {
10    WidgetsFlutterBinding.ensureInitialized();
11
12    final keyApplicationId = 'YOUR_APP_ID_HERE';
13    final keyClientKey = 'YOUR_CLIENT_KEY_HERE';
14
15    final keyParseServerUrl = 'https://parseapi.back4app.com';
16
17    await Parse().initialize(keyApplicationId, keyParseServerUrl,
18        clientKey: keyClientKey, debug: true);
19
20    runApp(MaterialApp(
21      title: 'Flutter - Storage File',
22      debugShowCheckedModeBanner: false,
23      home: HomePage(),
24    ));
25  }
26
27  class HomePage extends StatefulWidget {
28    @override
29    _HomePageState createState() => _HomePageState();
30  }
31
32  class _HomePageState extends State<HomePage> {
33    PickedFile? pickedFile;
34
35    List<ParseObject> results = <ParseObject>[];
36    double selectedDistance = 3000;
37
38    @override
39    Widget build(BuildContext context) {
40      return Scaffold(
41          body: Padding(
42        padding: const EdgeInsets.all(16.0),
43        child: Column(
44          crossAxisAlignment: CrossAxisAlignment.stretch,
45          children: [
46            Container(
47              height: 200,
48              child: Image.network(
49                  'https://blog.back4app.com/wp-content/uploads/2017/11/logo-b4a-1-768x175-1.png'),
50            ),
51            SizedBox(
52              height: 16,
53            ),
54            Center(
55              child: const Text('Flutter on Back4app - Save File',
56                  style: TextStyle(fontSize: 18, fontWeight: FontWeight.bold)),
57            ),
58            SizedBox(
59              height: 16,
60            ),
61            Container(
62              height: 50,
63              child: ElevatedButton(
64                child: Text('Upload File'),
65                style: ElevatedButton.styleFrom(primary: Colors.blue),
66                onPressed: () {
67                  Navigator.push(
68                    context,
69                    MaterialPageRoute(builder: (context) => SavePage()),
70                  );
71                },
72              ),
73            ),
74            SizedBox(
75              height: 8,
76            ),
77            Container(
78                height: 50,
79                child: ElevatedButton(
80                  child: Text('Display File'),
81                  style: ElevatedButton.styleFrom(primary: Colors.blue),
82                  onPressed: () {
83                    Navigator.push(
84                      context,
85                      MaterialPageRoute(builder: (context) => DisplayPage()),
86                    );
87                  },
88                ))
89          ],
90        ),
91      ));
92    }
93  }
94
95  class SavePage extends StatefulWidget {
96    @override
97    _SavePageState createState() => _SavePageState();
98  }
99
100 class _SavePageState extends State<SavePage> {
101   PickedFile? pickedFile;
102   bool isLoading = false;
103
104   @override
105   Widget build(BuildContext context) {
106     return Scaffold(
107       appBar: AppBar(
108         title: Text('Upload Fie'),
109       ),
110       body: Padding(
111         padding: const EdgeInsets.all(12.0),
112         child: Column(
113           crossAxisAlignment: CrossAxisAlignment.stretch,
114           children: [
115             SizedBox(height: 16),
116             GestureDetector(
117               child: pickedFile != null
118                   ? Container(
119                       width: 250,
120                       height: 250,
121                       decoration:
122                           BoxDecoration(border: Border.all(color: Colors.blue)),
123                       child: kIsWeb
124                           ? Image.network(pickedFile!.path)
125                           : Image.file(File(pickedFile!.path)))
126                   : Container(
127                       width: 250,
128                       height: 250,
129                       decoration:
130                           BoxDecoration(border: Border.all(color: Colors.blue)),
131                       child: Center(
132                         child: Text('Click here to pick image from Gallery'),
133                       ),
134                     ),
135               onTap: () async {
136                 PickedFile? image =
137                     await ImagePicker().getImage(source: ImageSource.gallery);
138
139                 if (image != null) {
140                   setState(() {
141                     pickedFile = image;
142                   });
143                 }
144               },
145             ),
146             SizedBox(height: 16),
147             Container(
148                 height: 50,
149                 child: ElevatedButton(
150                   child: Text('Upload file'),
151                   style: ElevatedButton.styleFrom(primary: Colors.blue),
152                   onPressed: isLoading || pickedFile == null
153                       ? null
154                       : () async {
155                           setState(() {
156                             isLoading = true;
157                           });
158                           ParseFileBase? parseFile;
159
160                           if (kIsWeb) {
161                             //Flutter Web
162                             parseFile = ParseWebFile(
163                                 await pickedFile!.readAsBytes(),
164                                 name: 'image.jpg'); //Name for file is required
165                           } else {
166                             //Flutter Mobile/Desktop
167                             parseFile = ParseFile(File(pickedFile!.path));
168                           }
169                           await parseFile.save();
170
171                           final gallery = ParseObject('Gallery')
172                             ..set('file', parseFile);
173                           await gallery.save();
174
175                           setState(() {
176                             isLoading = false;
177                             pickedFile = null;
178                           });
179
180                           ScaffoldMessenger.of(context)
181                             ..removeCurrentSnackBar()
182                             ..showSnackBar(SnackBar(
183                               content: Text(
184                                 'Save file with success on Back4app',
185                                 style: TextStyle(
186                                   color: Colors.white,
187                                 ),
188                               ),
189                               duration: Duration(seconds: 3),
190                               backgroundColor: Colors.blue,
191                             ));
192                         },
193                 ))
194           ],
195         ),
196       ),
197     );
198   }
199 }
200
201 class DisplayPage extends StatefulWidget {
202   @override
203   _DisplayPageState createState() => _DisplayPageState();
204 }
205
206 class _DisplayPageState extends State<DisplayPage> {
207   @override
208   Widget build(BuildContext context) {
209     return Scaffold(
210       appBar: AppBar(
211         title: Text("Display Gallery"),
212       ),
213       body: FutureBuilder<List<ParseObject>>(
214           future: getGalleryList(),
215           builder: (context, snapshot) {
216             switch (snapshot.connectionState) {
217               case ConnectionState.none:
218               case ConnectionState.waiting:
219                 return Center(
220                   child: Container(
221                       width: 100,
222                       height: 100,
223                       child: CircularProgressIndicator()),
224                 );
225               default:
226                 if (snapshot.hasError) {
227                   return Center(
228                     child: Text("Error..."),
229                   );
230                 } else {
231                   return ListView.builder(
232                       padding: const EdgeInsets.only(top: 8),
233                       itemCount: snapshot.data!.length,
234                       itemBuilder: (context, index) {
235                         //Web/Mobile/Desktop
236                        ParseFileBase? varFile =
237                             snapshot.data![index].get<ParseFileBase>('file');
238
239                         //Only iOS/Android/Desktop
240                         /*
241                         ParseFile? varFile =
242                             snapshot.data![index].get<ParseFile>('file');
243                         */
244                         return Image.network(
245                           varFile!.url!,
246                           width: 200,
247                           height: 200,
248                           fit: BoxFit.fitHeight,
249                         );
250                       });
251                 }
252             }
253           }),
254     );
255   }
256
257   Future<List<ParseObject>> getGalleryList() async {
258     QueryBuilder<ParseObject> queryPublisher =
259         QueryBuilder<ParseObject>(ParseObject('Gallery'))
260           ..orderByAscending('createdAt');
261     final ParseResponse apiResponse = await queryPublisher.query();
262
263     if (apiResponse.success && apiResponse.results != null) {
264       return apiResponse.results as List<ParseObject>;
265     } else {
266       return [];
267     }
268   }
269 }
당신의 ApplicationId 및 Client Key 자격 증명을 찾으려면 앱 대시보드->설정->보안 및 키로 이동하세요 Back4App 웹사이트.
다음 두 값을 사용하여 main.dart에서 코드를 업데이트하세요 ApplicationId 및 ClientKey를 Back4app에 입력하세요.
- keyApplicationId = AppId
- keyClientKey = Client Key
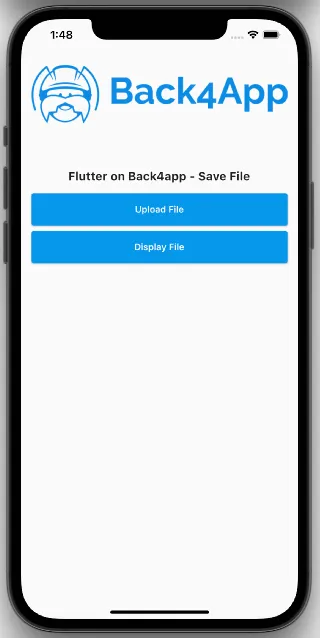
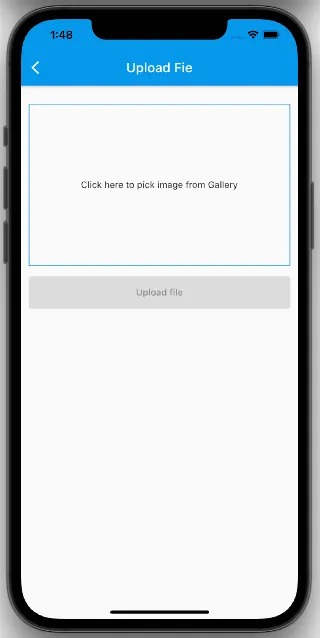
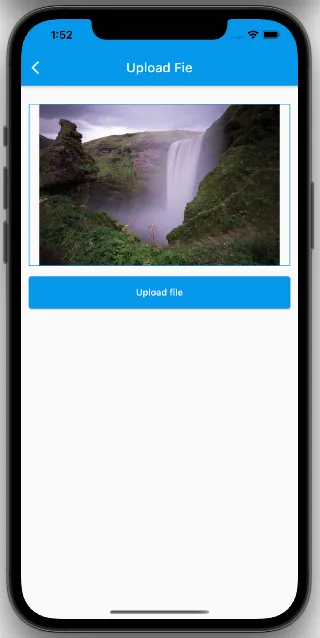
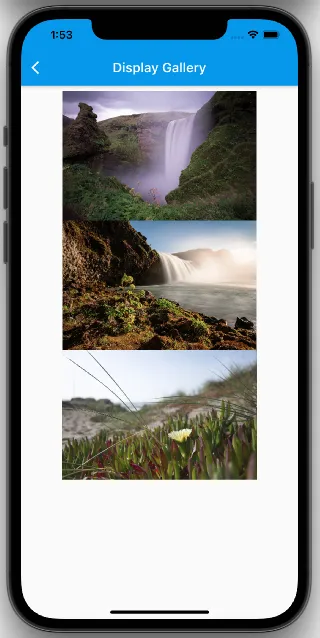
프로젝트를 실행하면 앱이 이미지와 같이 로드됩니다.
결론
이 시점에서, 당신은 Back4App에 이미지를 업로드하고 Flutter 애플리케이션에 표시했습니다.