안드로이드 Parse에서 기본 데이터 쿼리 수행 가이드
안드로이드의 기본 쿼리
소개
이 가이드에서는 Parse에서 기본 쿼리를 수행하고 Android 앱을 이러한 쿼리를 사용하여 구현합니다. Back4App을 사용하여 현실적인 데이터를 설정하고 쿼리하는 방법을 배웁니다. Android.
이 튜토리얼은 buildToolsVersion=30.0.2 , Compile SDK Version = 30.0.2 및 targetSdkVersion=30
언제든지 이 튜토리얼로 구축된 전체 안드로이드 프로젝트에 접근할 수 있습니다. 우리의 Github 저장소에서 확인하세요.
목표
우리의 목표는 Back4App에서 데이터를 쿼리하는 것입니다. Android 앱을 통해.
우리가 달성할 목표의 미리보기를 보여드립니다:
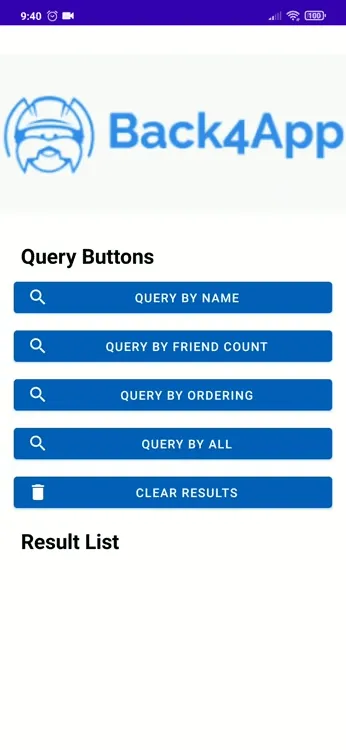
전제 조건
이 튜토리얼을 완료하려면 다음이 필요합니다:
- Back4App에서 생성된 앱.
- Back4App에 연결된 안드로이드 앱.
시작해봅시다!
다음 단계에 앞서, Back4App을(를) 우리 애플리케이션에 연결해야 합니다. appId와 clientKey를 Back4App에서 string.xml 파일에 저장한 후, Parse를 우리 App.java 또는 App.kt 파일에서 초기화해야 합니다. 새 Parse 앱 튜토리얼을(를) 따라 하세요. Parse를(을) 앱에 초기화하는 방법을 모른다면.
또는 위에 공유한 깃허브 링크에서 프로젝트를 다운로드하고 appId와 clientKey 부분만 수정할 수 있습니다.
1 - Parse.Query 클래스 이해하기
모든 Parse 쿼리 작업은 ParseQuery 객체 유형을 사용하며, 이는 앱 전반에 걸쳐 데이터베이스에서 특정 데이터를 검색하는 데 도움이 됩니다. ParseQuery는 retrieve 메서드(예: query.findInBackground 호출 후에만 해결된다는 것을 아는 것이 중요합니다. 따라서 쿼리를 설정하고 여러 수정자를 실제로 호출하기 전에 연결할 수 있습니다.
새로운 ParseQuery,를 생성하려면 원하는 ParseObject 하위 클래스를 매개변수로 전달해야 하며, 이 클래스가 쿼리 결과를 포함하게 됩니다. 아래에서 볼 수 있는 예제 쿼리에서는 가상의 Profile 하위 클래스가 쿼리되고 있습니다.
1   // This will create your query
2    val query = ParseQuery<ParseObject>("Profile")
3   // The query will resolve only after calling this method
4   query.findInBackground()
다음에 대한 자세한 내용을 읽을 수 있습니다. Parse.Query 클래스 공식 문서에서 여기.
2 - Back4App에 데이터를 저장하기
이 단계에서는 JS 콘솔과 Parse에서 제공하는 Javascript 코드를 사용하여 클래스를 생성하고 이 클래스에 대한 쿼리를 생성할 것입니다.
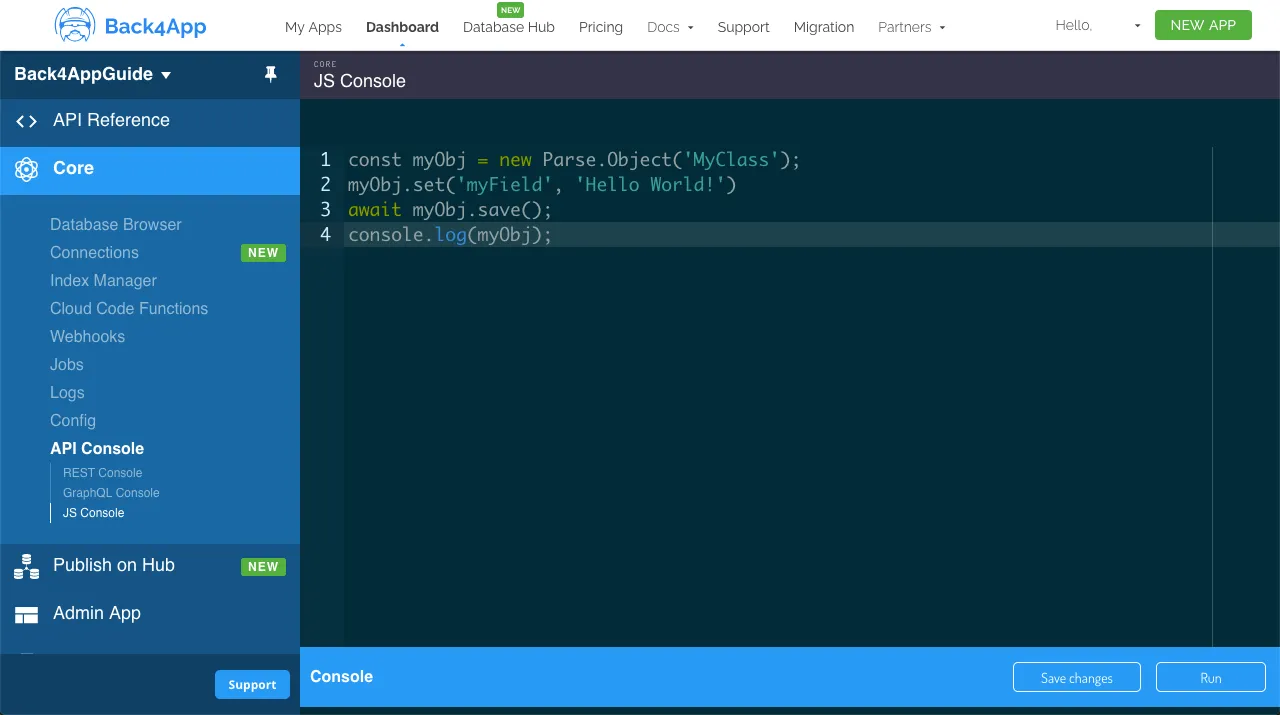
프로필 Profile 클래스를 생성합시다. 이 클래스는 이 가이드에서 우리의 쿼리 대상이 될 것입니다. Parse 대시보드 자바스크립트 콘솔에서는 JavaScript 코드를 직접 실행하고, JS SDK 명령어를 사용하여 애플리케이션 데이터베이스 내용을 쿼리하고 업데이트할 수 있습니다. 아래 코드를 JS 콘솔에서 실행하고 Back4App에 데이터를 삽입하세요.
대시보드에서 JS 콘솔이 어떻게 보이는지 확인해보세요:
사용자 Profile 클래스를 다음 예제 내용을 사용하여 생성하세요:
1   // Add Profile objects and create table
2   // Adam Sandler
3   let Profile = new Parse.Object('Profile');
4   Profile.set('name', 'Adam Sandler');
5   Profile.set('birthDay', new Date('09/09/1966'));
6   Profile.set('friendCount', 2);
7   Profile.set('favoriteFoods', ['Lobster', 'Bread']);
8   await Profile.save();
9
10  // Adam Levine
11  Profile = new Parse.Object('Profile');
12  Profile.set('name', 'Adam Levine');
13  Profile.set('birthDay', new Date('03/18/1979'));
14  Profile.set('friendCount', 52);
15  Profile.set('favoriteFoods', ['Cake', 'Bread']);
16  await Profile.save();
17
18  // Carson Kressley
19  Profile = new Parse.Object('Profile');
20  Profile.set('name', 'Carson Kressley');
21  Profile.set('birthDay', new Date('11/11/1969'));
22  Profile.set('friendCount', 12);
23  Profile.set('favoriteFoods', ['Fish', 'Cookies']);
24  await Profile.save();
25
26  // Dan Aykroyd
27  Profile = new Parse.Object('Profile');
28  Profile.set('name', 'Dan Aykroyd');
29  Profile.set('birthDay', new Date('07/01/1952'));
30  Profile.set('friendCount', 66);
31  Profile.set('favoriteFoods', ['Jam', 'Peanut Butter']);
32  await Profile.save();
33
34  // Eddie Murphy
35  Profile = new Parse.Object('Profile');
36  Profile.set('name', 'Eddie Murphy');
37  Profile.set('birthDay', new Date('04/03/1961'));
38  Profile.set('friendCount', 49);
39  Profile.set('favoriteFoods', ['Lettuce', 'Pepper']);
40  await Profile.save();
41
42  // Fergie
43  Profile = new Parse.Object('Profile');
44  Profile.set('name', 'Fergie');
45  Profile.set('birthDay', new Date('03/27/1975'));
46  Profile.set('friendCount', 55);
47  Profile.set('favoriteFoods', ['Lobster', 'Shrimp']);
48  await Profile.save();
49
50  console.log('Success!');
3 - 데이터 쿼리하기
이제 클래스가 채워졌으므로, 기본 쿼리를 수행할 수 있습니다. 이름으로 결과를 필터링하는 것부터 시작하겠습니다. 이는 문자열 유형 필드로, Profile이라는 이름을 포함하는 값을 검색합니다. 아담을 사용하여 Parse.Query.contains 메서드를 사용합니다:
1   // Create your query
2   let parseQuery = new Parse.Query('Profile');
3
4   // `contains` is a basic query method that checks if string field
5   // contains a specific substring
6   parseQuery.contains('name', 'Adam');
7
8   // The query will resolve only after calling this method, retrieving
9   // an array of `Parse.Objects`
10  let queryResults = await parseQuery.find();
11
12  // Let's show the results
13  for (let result of queryResults) {
14    // You access `Parse.Objects` attributes by using `.get`
15    console.log(result.get('name'));
16  };
이제 숫자 유형 필드로 쿼리해 보겠습니다 friendCount을 사용하여 또 다른 일반 쿼리 메서드인 Parse.Query.greaterThan. 이 경우, 친구 수가 20보다 큰 Profiles를 원합니다.
1   // Create your query
2   let parseQuery = new Parse.Query('Profile');
3
4   // `greaterThan` is a basic query method that does what it
5   // says on the tin
6   parseQuery.greaterThan('friendCount', 20);
7
8   // The query will resolve only after calling this method, retrieving
9   // an array of `Parse.Objects`
10  let queryResults = await parseQuery.find();
11
12  // Let's show the results
13  for (let result of queryResults) {
14    // You access `Parse.Objects` attributes by using `.get`
15    console.log(`name: ${result.get('name')}, friend count: ${result.get('friendCount')}`);
16  };
다른 반복 쿼리 메서드는 Parse.Query.ascending 및 Parse.Query.descending, 쿼리를 정렬하는 역할을 합니다. 이 정렬은 대부분의 데이터 유형에서 수행할 수 있으므로, 날짜 필드 birthDay를 기준으로 쿼리를 가장 어린 사람으로 정렬해 보겠습니다.
1   // Create your query
2   let parseQuery = new Parse.Query('Profile');
3
4   // `descending` and `ascending` can and should be chained
5   // with other query methods to improve your queries
6   parseQuery.descending('birthDay');
7
8   // The query will resolve only after calling this method, retrieving
9   // an array of `Parse.Objects`
10  let queryResults = await parseQuery.find();
11
12  // Let's show the results
13  for (let result of queryResults) {
14    // You access `Parse.Objects` attributes by using `.get`
15    console.log(`name: ${result.get('name')}, birthday: ${result.get('birthDay')}`);
16  };
앞서 언급했듯이, 더 정교한 결과를 얻기 위해 쿼리 메서드를 연결할 수 있으며 연결해야 합니다. 그러면 이전 예제를 단일 쿼리 요청으로 결합해 보겠습니다:
1   // Create your query
2   let parseQuery = new Parse.Query('Profile');
3
4   parseQuery.contains('name', 'Adam');
5   parseQuery.greaterThan('friendCount', 20);
6   parseQuery.descending('birthDay');
7
8   // The query will resolve only after calling this method, retrieving
9   // an array of `Parse.Objects`
10  let queryResults = await parseQuery.find();
11
12  // Let's show the results
13  for (let result of queryResults) {
14    // You access `Parse.Objects` attributes by using `.get`
15    console.log(`name: ${result.get('name')}, friend count: ${result.get('friendCount')}, birthday: ${result.get('birthDay')}`);
16  };
4 - 우리 Android 앱에서의 쿼리
이제 Android 애플리케이션에서 Java와 Kotlin을 사용하여 위에서 JS 콘솔로 수행한 작업을 수행하겠습니다. 4개의 서로 다른 쿼리를 만들어 프로필을 나열할 것입니다.
1   private void doQueryByName() {
2           ParseQuery<ParseObject> query = new ParseQuery<>("Profile");
3           query.whereContains("name", "Adam");
4           progressDialog.show();
5           query.findInBackground((objects, e) -> {
6               progressDialog.hide();
7               if (e == null) {
8                   adapter = new ResultAdapter(this, objects);
9                   resultList.setLayoutManager(new LinearLayoutManager(this));
10                  resultList.setAdapter(adapter);
11              } else {
12                  Toast.makeText(this, e.getLocalizedMessage(), Toast.LENGTH_SHORT).show();
13              }
14          });
15      }
16
17      private void doQueryByFriendCount() {
18          ParseQuery<ParseObject> query = new ParseQuery<>("Profile");
19          query.whereGreaterThan("friendCount", 20);
20          progressDialog.show();
21          query.findInBackground((objects, e) -> {
22              progressDialog.hide();
23              if (e == null) {
24                  adapter = new ResultAdapter(this, objects);
25                  resultList.setLayoutManager(new LinearLayoutManager(this));
26                  resultList.setAdapter(adapter);
27              } else {
28                  Toast.makeText(this, e.getLocalizedMessage(), Toast.LENGTH_SHORT).show();
29              }
30          });
31      }
32
33      private void doQueryByOrdering() {
34          ParseQuery<ParseObject> query = new ParseQuery<>("Profile");
35          query.orderByDescending("birthDay");
36          progressDialog.show();
37          query.findInBackground((objects, e) -> {
38              progressDialog.hide();
39              if (e == null) {
40                  adapter = new ResultAdapter(this, objects);
41                  resultList.setLayoutManager(new LinearLayoutManager(this));
42                  resultList.setAdapter(adapter);
43              } else {
44                  Toast.makeText(this, e.getLocalizedMessage(), Toast.LENGTH_SHORT).show();
45              }
46          });
47      }
48
49      private void doQueryByAll() {
50          ParseQuery<ParseObject> query = new ParseQuery<>("Profile");
51          query.whereContains("name", "Adam");
52          query.whereGreaterThan("friendCount", 20);
53          query.orderByDescending("birthDay");
54          progressDialog.show();
55
56          query.findInBackground((objects, e) -> {
57              progressDialog.hide();
58
59              if (e == null) {
60                  adapter = new ResultAdapter(this, objects);
61                  resultList.setLayoutManager(new LinearLayoutManager(this));
62                  resultList.setAdapter(adapter);
63                  resultList.setNestedScrollingEnabled(false);
64              } else {
65                  Toast.makeText(this, e.getLocalizedMessage(), Toast.LENGTH_SHORT).show();
66              }
67          });
68      }
완료되었습니다!
이 가이드를 끝내면서, Parse에서 기본 데이터 쿼리가 어떻게 작동하는지와 Android 앱에서 Back4App에서 이를 수행하는 방법을 배웠습니다.