User Registration
User Registration for Flutter using Parse Server
Introduction
At the core of many apps, user accounts have a notion that lets users securely access their information. Parse provides a specialized User class that automatically handles much of the functionality required for user account management. With this class, you’ll be able to add user account functionality to your app.
ParseUser is a subclass of the ParseObject, and has the same features. All the methods that are on ParseObject also exist in ParseUser. The difference is that ParseUser has some special additions specific to user accounts. ParseUser has several properties that set it apart from ParseObject:
- username: The username for the user (required).
- password: The password for the user (required on signup).
- email: The email address for the user (optional).
You are free to use an email address as the username. Ask your users to enter their email, but fill it in the username property — ParseUser will work as normal.
In this guide, you will learn how to use the Flutter plugin for Parse Server to manage users using ParseUser class creating a user registration feature for your Flutter App.
Goal
To build a User Registration feature using Parse for a Flutter App.
Prerequisites
To complete this tutorial, you will need:
- An Flutter app connected to Back4app.
- Note: Follow the Install Parse SDK on Flutter project to create an Flutter Project connected to Back4App.
- A device (or virtual device) running Android or iOS.
Understanding the SignUp App
To better understand the SignUp process, we will create an app to register user data and create your account. We won’t explain the Flutter application code once this guide’s primary focus is using the Flutter with Parse. Following the next steps, you will build a Todo App that will store the tasks at Back4App Database.
Let’s get started!
Following the next steps you will be able to build a Sign App that will create user Account in Back4App Database.
1 - Create Sign App Template
Open your Flutter project from the previous guide Flutter plugin for Parse Server. Go to the main.dart file, clean up all the code, and replace it with:
1   import 'package:flutter/material.dart';
2   import 'package:parse_server_sdk_flutter/parse_server_sdk.dart';
3
4   void main() async {
5     WidgetsFlutterBinding.ensureInitialized();
6
7     final keyApplicationId = 'YOUR_APP_ID_HERE';
8     final keyClientKey = 'YOUR_CLIENT_KEY_HERE';
9     final keyParseServerUrl = 'https://parseapi.back4app.com';
10
11    await Parse().initialize(keyApplicationId, keyParseServerUrl,
12        clientKey: keyClientKey, debug: true);
13
14    runApp(MyApp());
15  }
16
17  class MyApp extends StatelessWidget {
18    @override
19    Widget build(BuildContext context) {
20      return MaterialApp(
21        title: 'Flutter SignUp',
22        theme: ThemeData(
23          primarySwatch: Colors.blue,
24          visualDensity: VisualDensity.adaptivePlatformDensity,
25        ),
26        home: HomePage(),
27      );
28    }
29  }
30
31  class HomePage extends StatefulWidget {
32    @override
33    _HomePageState createState() => _HomePageState();
34  }
35
36  class _HomePageState extends State<HomePage> {
37    final controllerUsername = TextEditingController();
38    final controllerPassword = TextEditingController();
39    final controllerEmail = TextEditingController();
40
41    @override
42    Widget build(BuildContext context) {
43      return Scaffold(
44          appBar: AppBar(
45            title: const Text('Flutter SignUp'),
46          ),
47          body: Center(
48            child: SingleChildScrollView(
49              padding: const EdgeInsets.all(8),
50              child: Column(
51                crossAxisAlignment: CrossAxisAlignment.stretch,
52                children: [
53                  Container(
54                    height: 200,
55                    child: Image.network(
56                        'http://blog.back4app.com/wp-content/uploads/2017/11/logo-b4a-1-768x175-1.png'),
57                  ),
58                  Center(
59                    child: const Text('Flutter on Back4App',
60                        style:
61                            TextStyle(fontSize: 18, fontWeight: FontWeight.bold)),
62                  ),
63                  SizedBox(
64                    height: 16,
65                  ),
66                  Center(
67                    child: const Text('User registration',
68                       style: TextStyle(fontSize: 16)),
69                  ),
70                  SizedBox(
71                    height: 16,
72                  ),
73                  TextField(
74                    controller: controllerUsername,
75                    keyboardType: TextInputType.text,
76                    textCapitalization: TextCapitalization.none,
77                    autocorrect: false,
78                    decoration: InputDecoration(
79                        border: OutlineInputBorder(
80                            borderSide: BorderSide(color: Colors.black)),
81                        labelText: 'Username'),
82                  ),
83                  SizedBox(
84                    height: 8,
85                  ),
86                  TextField(
87                    controller: controllerEmail,
88                    keyboardType: TextInputType.emailAddress,
89                    textCapitalization: TextCapitalization.none,
90                    autocorrect: false,
91                    decoration: InputDecoration(
92                        border: OutlineInputBorder(
93                            borderSide: BorderSide(color: Colors.black)),
94                        labelText: 'E-mail'),
95                  ),
96                  SizedBox(
97                    height: 8,
98                  ),
99                  TextField(
100                   controller: controllerPassword,
101                   obscureText: true,
102                   keyboardType: TextInputType.text,
103                   textCapitalization: TextCapitalization.none,
104                   autocorrect: false,
105                   decoration: InputDecoration(
106                       border: OutlineInputBorder(
107                           borderSide: BorderSide(color: Colors.black)),
108                       labelText: 'Password'),
109                 ),
110                 SizedBox(
111                   height: 8,
112                 ),
113                 Container(
114                   height: 50,
115                   child: TextButton(
116                     child: const Text('Sign Up'),
117                     onPressed: () => doUserRegistration(),
118                   ),
119                 )
120               ],
121             ),
122           ),
123         ));
124   }
125
126   void showSuccess() {
127     showDialog(
128       context: context,
129       builder: (BuildContext context) {
130         return AlertDialog(
131           title: const Text("Success!"),
132           content: const Text("User was successfully created!"),
133           actions: <Widget>[
134             new FlatButton(
135               child: const Text("OK"),
136               onPressed: () {
137                 Navigator.of(context).pop();
138               },
139             ),
140           ],
141         );
142       },
143     );
144   }
145
146   void showError(String errorMessage) {
147     showDialog(
148       context: context,
149       builder: (BuildContext context) {
150         return AlertDialog(
151           title: const Text("Error!"),
152           content: Text(errorMessage),
153           actions: <Widget>[
154             new FlatButton(
155               child: const Text("OK"),
156               onPressed: () {
157                 Navigator.of(context).pop();
158               },
159             ),
160           ],
161         );
162       },
163     );
164   }
165
166   void doUserRegistration() async {
167 		//Sigup code here
168   }
169 }
170
When debug parameter in function Parse().initialize is true, allows displaying Parse API calls on the console. This configuration can assist in debugging the code. It is advisable to disable debug in the release version.
2 - Connect Template to Back4app Project
Find your Application Id and Client Key credentials navigating to your app Dashboard at Back4App Website.
Update your code in main.dart with the values of your project’s ApplicationId and ClientKey in Back4app.
- keyApplicationId = App Id
- keyClientKey = Client Key
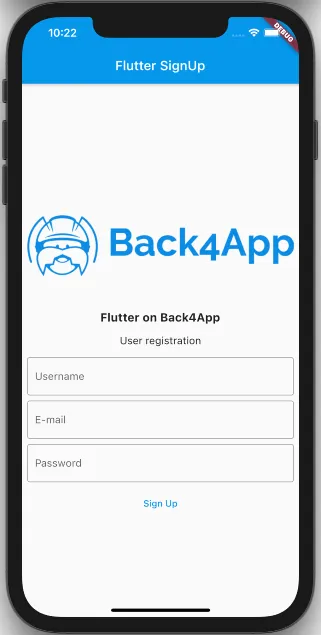
Run the project, and the app will load as shown in the image.
3 - Code for Sign User
The User SignUp function creates a new user in your Parse App. Before that, it checks to make sure that both the username and email are unique. If a SignUp isn’t successful, you should check the error object that is returned. The most likely cause is that another user has already taken the username or email. You should communicate this to your users and ask them to try a different username.
Search for the function doUserRegistration in the file main.dart. Replace the code inside doUserRegistration with:
1       final username = controllerUsername.text.trim();
2       final email = controllerEmail.text.trim();
3       final password = controllerPassword.text.trim();
4
5       final user = ParseUser.createUser(username, password, email);
6
7       var response = await user.signUp();
8
9       if (response.success) {
10        showSuccess();
11      } else {
12        showError(response.error!.message);
13      }
To build this function, follow these steps:
- Make a new instance of the ParseUser class with the command ParseUser.createUser(username, password, email), with data that were filled in the app.
- Call the signUpfunction, which will register user to your database in the Parse Dashboard.
- Check if user signup with success. If not success, show error description message.
The complete code should look like this:
1     void doUserRegistration() async {
2       final username = controllerUsername.text.trim();
3       final email = controllerEmail.text.trim();
4       final password = controllerPassword.text.trim();
5
6       final user = ParseUser.createUser(username, password, email);
7
8       var response = await user.signUp();
9
10      if (response.success) {
11        showSuccess();
12      } else {
13        showError(response.error!.message);
14      }
15    }
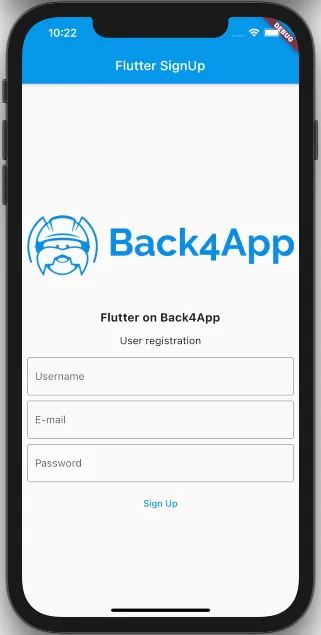
To test it, click on the Run button in Android Studio/VSCode.
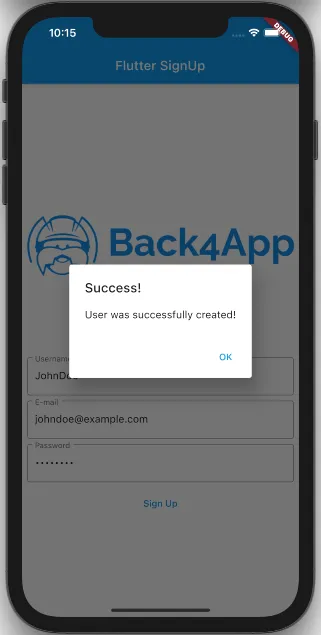
After providing the desired user credentials, you will see this message after pressing on Sign Up if everything was successful:
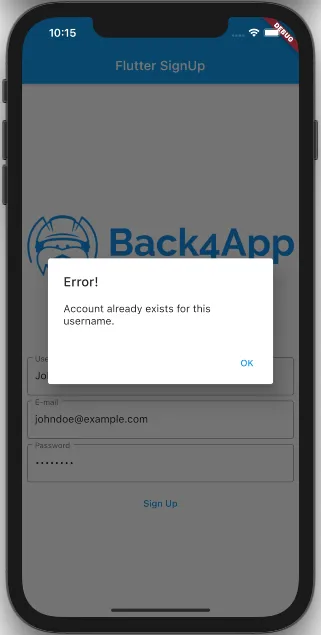
Error handling can be tested if you try to register a user with the same username as before:
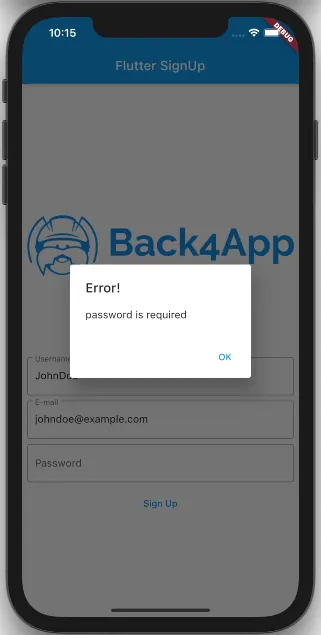
You will get another error if you try to sign up with no password:
4 - Check User Registration on Dashboard
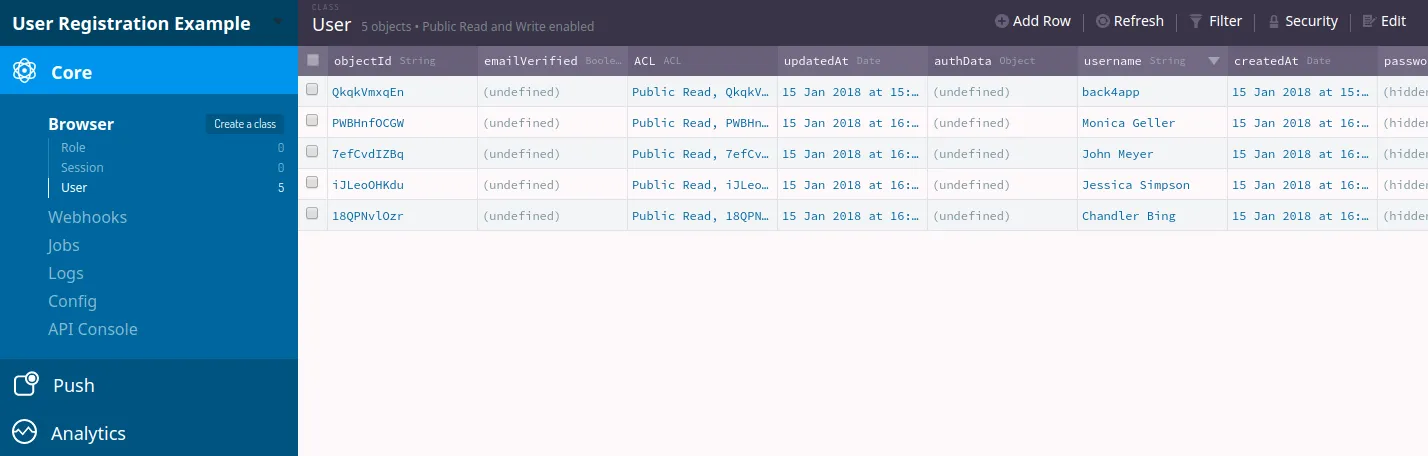
- Find your app and click on Dashboard>Core>Browser>User.
At this point, you should see your user as displayed below:
It’s done!
At the end of this guide, you learned how to register new Parse users on Flutter. In the next guide, we will show you how to log in and out users.