Ionic으로 Back4App을 활용한 로그인 인터페이스 구현하기
Ionic 프레임워크 프로젝트에 로그인 화면 추가하는 방법
소개
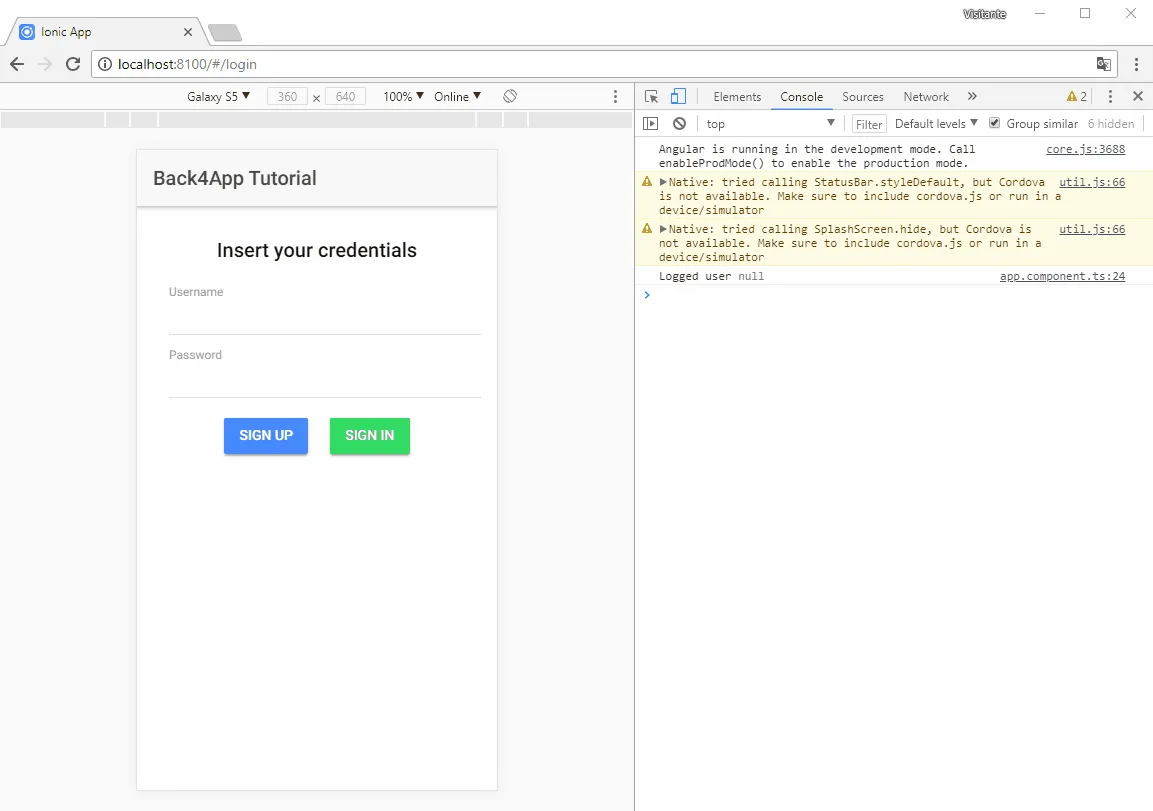
이 섹션에서는 Ionic 앱에 페이지를 생성하고, 회원가입, 로그인 및 로그아웃을 구현하는 방법을 배웁니다.
이렇게 보일 것입니다:
전제 조건
이 빠른 시작을 완료하려면 다음이 필요합니다:
- Back4App에서 생성된 앱.
언제든지 이 튜토리얼로 구축된 전체 Ionic 프로젝트에 접근할 수 있습니다. GitHub 리포지토리.
1 - parse SDK 설치
기존 Ionic 프로젝트가 있다고 가정할 때, 가장 먼저 해야 할 일은 parse SDK를 설치하는 것입니다. 다음 명령어를 실행하여 설치할 수 있습니다:
2 - 앱의 자격 증명 설정
- 당신의 app.component.ts, parse를 가져오고 Back4App Parse 서버에 대한 연결을 초기화합니다.
1   Parse.initialize("YOUR-APP-ID", "YOUR-JS-KEY");
2   Parse.serverURL = 'https://parseapi.back4app.com/';
키를 찾는 방법을 모른다면, 첫 번째 Ionic 튜토리얼을 확인하세요 템플릿에서 시작하기.
3 - 로그인 페이지 만들기
이제 로그인 페이지를 만들어 보겠습니다. 다행히도 Ionic이 모든 것을 처리해 줍니다. 우리가 해야 할 일은 다음 명령어를 실행하는 것입니다:
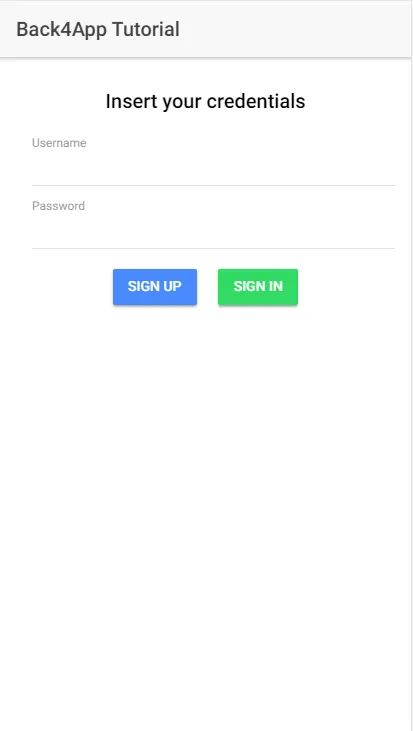
이 페이지 뷰에서는 사용자 이름과 비밀번호 입력란과 회원가입 및 로그인 버튼 두 개를 추가해야 합니다.
1     <h4 text-center margin-top>Insert your credentials</h4>
2
3     <ion-item>
4       <ion-label stacked>Username</ion-label>
5       <ion-input [(ngModel)]="username"></ion-input>
6     </ion-item>
7
8     <ion-item>
9       <ion-label stacked>Password</ion-label>
10      <ion-input type="password" [(ngModel)]="password"></ion-input>
11    </ion-item>
12
13    <div text-center margin-top>
14      <button ion-button margin-right (click)="signUp()">
15        SIGN UP
16      </button>
17
18      <button ion-button color="secondary" (click)="signIn()">
19        SIGN IN
20      </button>
21    </div>
이제 signIn() 및 signUp() 메서드를 구현해 보겠습니다. 이는 우리의 로그인 뷰에서 언급되었습니다.
1     signUp() {
2       Parse.User.signUp(this.username, this.password).then((resp) => {
3         console.log('Logged in successfully', resp);
4
5         // Clears up the form
6         this.username = '';
7         this.password = '';
8
9         this.toastCtrl.create({
10          message: 'Account created successfully',
11          duration: 2000
12        }).present();
13      }, err => {
14        console.log('Error signing in', err);
15
16        this.toastCtrl.create({
17          message: err.message,
18          duration: 2000
19        }).present();
20      });
21    }
자세한 내용을 알아보세요 signUp() 에서 Parse 문서.
1     signIn() {
2       Parse.User.logIn(this.username, this.password).then((resp) => {
3         console.log('Logged in successfully', resp);
4
5         // If you app has Tabs, set root to TabsPage
6         this.navCtrl.setRoot('HomePage')
7       }, err => {
8         console.log('Error logging in', err);
9
10        this.toastCtrl.create({
11          message: err.message,
12          duration: 2000
13        }).present();
14      });
15    }
자세한 내용을 알아보세요 Parse.User.logIn() 에서 Parse 문서.
이것이 어떻게 보여야 하는지입니다.
4 - 로그아웃 구현하기
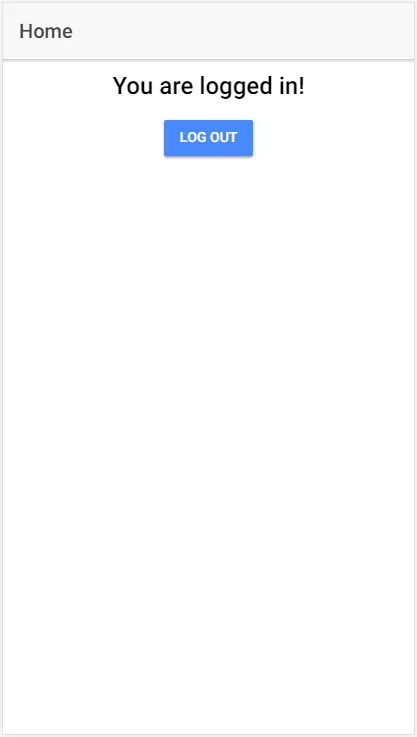
홈페이지(또는 사용자가 로그인 후 이동할 페이지)로 이동하여 로그아웃을 구현해 보겠습니다.
먼저, home.html을 열고 로그아웃을 위한 버튼을 추가하세요.
1     <h2 text-center>You are logged in!</h2>
2
3     <div margin-top text-center>
4       <button ion-button (click)="logOut()">
5         Log out
6       </button>
7     </div>
이제 logOut() 메서드를 구현하고 요청이 실패할 경우 Toast 컴포넌트를 추가합시다.
1     logOut() {
2       Parse.User.logOut().then((resp) => {
3         console.log('Logged out successfully', resp);
4
5         this.navCtrl.setRoot('LoginPage');
6       }, err => {
7         console.log('Error logging out', err);
8
9         this.toastCtrl.create({
10          message: 'Error logging out',
11          duration: 2000
12        }).present();
13      })
14    }
자세히 알아보세요 Parse.User.logOut() 에서 Parse 문서.
이렇게 보여야 합니다.
5 - 루트 페이지 설정
의 중요한 기능은 parse가 장치에서 사용자가 로그인했는지 여부를 기억한다는 것입니다. 즉, 사용자가 앱을 닫더라도 앱이 열릴 때 세션을 복원할 수 있습니다.
이를 통해 앱의 초기 페이지가 우리의 LoginPage 또는 HomePage가 될지를 결정할 수 있습니다.
이를 위해 우리는 단지 currentAsync(). 호출하면 됩니다. 이는 로그인된 사용자를 반환하거나 null을 반환합니다.
1     Parse.User.currentAsync().then(user => {
2       console.log('Logged user', user);
3
4       this.rootPage = user ? 'HomePage' : 'LoginPage';
5     }, err => {
6       console.log('Error getting logged user');
7
8       this.rootPage = 'LoginPage';
9     })
자세히 알아보세요 Parse.User.currentAsync() 에서 Parse 문서.
마지막으로, 모든 설정이 완료되었습니다!
이 시점에서 ionic serve를 실행하면 로그인, 회원가입 및 로그아웃 기능이 작동하며, 사용자가 로그아웃할 때까지 로그인한 사용자를 기억합니다.